Showing posts with label cream cheese. Show all posts

Monday, October 27, 2014

Pumpkin cupcakes

Pumpkin Spice Cupcakes with Cream Cheese Frosting

Today I went to a great gelato place in downtown Los Angeles and they had a pumpkin spiced affogato.  YUM.  I realized after making these cupcakes that I should have added a couple of teaspoons of espresso to make this a pumpkin spice latte cupcake.  Oops.  Well that is my next inspiration.

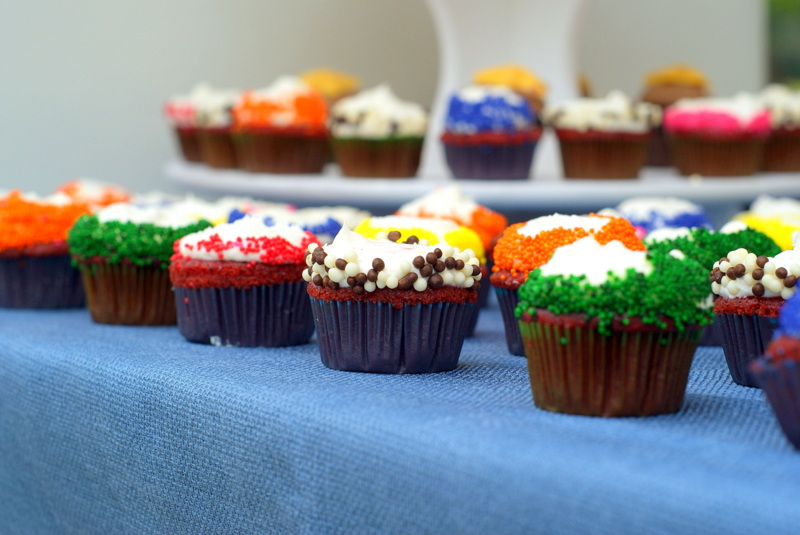
This time of year makes me so  happy.  It's not just the pumpkins.  It's the pomegranates and butternut squash and soups that excite me.  I have a pomegranate tree with fruits just almost turning a beautiful red.  So excited to pick those!  Anyhow back to the pumpkin...  It doesn't feel like autumn here in sunny SoCal so I thought I would make it fall with these beautiful leaf cupcake liners and sprinkles.


Pumpkin Spice Cupcakes Recipe
Adapted from Georgetown Cupcake

Ingredients
2‑1/2 cups all-purpose flour
3 teaspoons baking powder
4 teaspoons pumpkin pie spice
1/2 teaspoon salt
16 tablespoons unsalted butter, at room temperature
2 cups sugar
4 eggs
1‑1/2 cups pumpkin puree
2 tablespoons mango honey
1/3 cup hot water
For the Cream Cheese Frosting:
8 tablespoons unsalted butter, at room temperature
8 cups confectioner's sugar, sifted
1/2 teaspoon pure vanilla extract
12 ounces cream cheese, at room temperature

Directions
Preheat the oven to 350 degrees Fahrenheit. Line two standard cupcake pans with twelve paper baking cups each, or grease pans with butter if not using baking cups.

Sift together the flour, baking powder, pumpkin pie spice, and salt on a sheet of parchment paper or wax paper and set aside.

Place the butter in the bowl of a stand mixer or in a bowl with a handheld electric mixer. Beat on medium speed until fluffy. Stop to add the sugar; then beat on medium speed until well incorporated.
Add the eggs one at a time, mixing slowly after each addition. Mix in the pumpkin puree and honey. Reduce the speed to low. Add one third of the flour mixture to the butter mixture, then gradually add one third of the hot water, beating until well incorporated. Add another third of the flour mixture, followed by one third of the hot water. Stop to scrape down the bowl as needed. Add the remaining flour mixture, followed by the remaining hot water, and mix slowly until just combined. Take care not to overmix the batter so the cupcakes will bake up light and fluffy.

Use a standard-size ice cream scoop to fill each baking cup with batter, so the wells are two-thirds full. Bake for 20 to 25 minutes or until a toothpick inserted into the center of a cupcake comes out clean. Transfer the pan to a wire rack to cool completely.

For the Frosting:
Place all the ingredients in the bowl of an electric mixer fitted with the paddle attachment; beat until well combined. Be sure to beat on high speed for at least two minutes at the end to ensure that the frosting is light and fluffy.


Monday, October 20, 2014

Hashbrown Quiche


Pepperjack cheese quiche with hash-brown crust


Weekend brunch item to knock your socks off!  Pepperjack cheese is one of my favorites.  Actually I think all cheeses are my favorite.  

I've been wanting to make this dish for a long time and the hash-browns were just waiting to be opened.  When I decided to make it this morning I realized I didn't have enough sour cream so I used some cream cheese instead.  I only had extra large eggs so I reduced it to be roughly the same amount as a large egg.  I didn't have scallions so I opened up one of my salad packs and sprinkled on some chopped spinach.  

Changing a recipe to what you have on hand is really easy.  Trust yourself that it will still taste good and making mistakes is the only way we can understand how ingredients work in a recipe.


Pepperjack cheese quiche with hash-brown crust recipe
Adapted from Martha Stewart

Ingredients
2 tablespoons butter, softened, plus more for pan
1 package (1 pound) frozen hash brown potatoes, thawed
8 extra large eggs
Coarse salt and ground pepper
1 cup reduced-fat sour cream
1/2 cup cream cheese
4 to 5 ounces shredded pepperjack cheese, room temperature
1/4 cup baby spinach leaves, chopped


Directions
Preheat oven to 375 degrees. Brush a 9-by-2 1/2-inch springform pan with butter. Line the sides of the pan with strips of waxed paper (the same height as pan); brush paper with butter.


Squeeze excess moisture from hash browns. Mix in a bowl with butter, 1 egg, 1 teaspoon coarse salt, and 1/4 teaspoon pepper.   
Tip: beat egg separately then add to the hash-brown mixture to make sure the egg mixes properly.


Pat into bottom and up sides of prepared pan, using a moistened dry measuring cup. 


Place on a rimmed baking sheet; bake until set, 15 to 20 minutes.


In a large bowl, whisk sour cream, cream cheese,  pepperjack cheese, 1 1/2 teaspoons coarse salt, and 1/4 teaspoon pepper until well combined; whisk in 7 remaining eggs.   
Tip: beating the eggs in a separate container and then adding them to your mixture ensures the whites and yolks will be distributed evenly.


Pour into crust, and sprinkle with spinach. Bake until set, 45 to 50 minutes. 


Unmold quiche, and peel off waxed paper before serving.  


Voila!  Perfect quiche!  So yummy!


Monday, October 13, 2014

Classic cheesecake

Classic cheesecake with Strawberry Creme Anglaise

It's one of those recipes that you pop out for your loved one or somebody special.  But I say you should just make it for yourself because you deserve it.  Working hard, juggling jobs, parenting, relationships and the list goes on.  

I had a chance to watch Disney's Brave with my almost seven year old son.  I was thrilled to see that the princess finally did not need true love to find happiness.  There's something that she said at the end of the movie that resonated with me.  Princess Merida: "There are those who say fate is something beyond our command. That destiny is not our own, but I know better. Our fate lives within us, you only have to be brave enough to see it."  So what is fate and why do people believe in it.  Is it really as simple as Merida tells us?  Does fate live within us?  And how does psychotherapy fit into it?


Theraputic topic for the week: fate and destiny.

Destiny is different than fate. Destiny, as psychiatrist Alexander Lowen (1980) notes, "is related to the word destination. It refers to what . . . [we become], whereas fate describes what one is." (p. 49) Destiny is what we do with fate, how we play the hand we're each dealt by fate. Destiny is determined not solely by fate, but by how we choose to respond to fate. We are responsible for those choices. Part of each person's fate includes a personal destiny. But whether that destiny is fulfilled or not depends in part on the person and whether he or she is willing to accept responsibility for and courageously pursue that destiny. Finding and fulfilling our destiny is a principal goal of existential depth psychology.
Excerpt from Psychology Today in an article called Essential Secrets of Psychotherapy : Fate, Destiny and Responsibility written by Stephen Diamond.


Classic Cheesecake Recipe

Ingredients:
For the crust:
1 3/4 cups graham cracker crumbs
1/4 cup firmly packed brown sugar
8 Tbs. (1 stick) unsalted butter, melted and cooled

For the filling:
2 lb. cream cheese, at room temperature
1 cup granulated sugar
1 cup heavy cream
1 tsp. vanilla extract
1 Tbs. water
1 tsp. unflavored gelatin

To serve: Strawberry Creme Anglaise
2 cups half-and-half or whole milk
1 vanilla bean, split lengthwise
1/2 cup sugar
4 large egg yolks, at room temperature
1 cup strawberries

Directions:
Preheat an oven to 350°F.

To make the crust, in a food processor fitted with the metal blade, combine the graham cracker crumbs, brown sugar and lemon zest, and process to mix well. Add the butter and process until the crumbs begin to stick together. Drape your hand with plastic wrap to form a glove, and press the crumbs evenly and firmly over the bottom and 2 inches up the side of a 9-by-2 1/2-inch springform pan. Bake the crust 10 minutes. Remove from the oven and cool to room temperature, about 30 minutes.

To make the filling, in a large bowl, combine the cream cheese and granulated sugar. Using an electric mixer, beat on medium speed until well blended. Beat in 1/2 cup of the cream and the vanilla until incorporated.

Place the water in a small saucepan. Sprinkle the gelatin over the water and let soften for 5 minutes. Place the saucepan over low heat and stir until the gelatin is dissolved, then gradually whisk in the remaining 1/2 cup cream. Add the gelatin mixture to the cream cheese mixture and beat until fluffy, about 1 minute. Spoon the filling into the cooled crust. Cover with aluminum foil and refrigerate overnight or up to 2 days. 

For the strawberry creme anglaise: Set a large fine strainer over a medium bowl and set the bowl in a shallow pan of cold water. In a large saucepan, combine the half-and-half and vanilla bean and cook over moderately low heat just until small bubbles appear around the rim, about 5 minutes.
In another medium bowl, whisk the sugar and egg yolks just until combined. Whisk in half of the hot half-and-half in a thin stream. Pour the mixture into the saucepan and cook over moderate heat, stirring constantly with a wooden spoon, until the sauce has thickened slightly, 4 to 5 minutes. Immediately strain the sauce into the bowl in the cold water bath to stop the cooking. Scrape the vanilla seeds into the sauce. Refrigerate until chilled.  Hull strawberries and add blender with the creme anglaise. Blend thoroughly. 

To serve, run a knife around the pan sides to loosen the cake. Release the pan sides and place the cake on a plate. Cut the cake into individual slices and spoon strawberry creme anglaise over each slice.


Wednesday, December 18, 2013

Pumpkin Maple Cheesecake

Pumpkin Maple Pecan Cheesecake
Instead of having pie over your holiday season try cheesecake!  It's super fluffy, velvety and luscious with that pumpkin spice flavor you just can't miss.  Not too sweet and topped with a maple glaze that will have you singing for the holidays.  Grab a slice or two and bring to share with friends and family.

Tip: this cheesecake is so fluffy that it must stay in the fridge overnight.  I only let it set for six hours and it was a little crumbly after slicing into it.  But it still tasted delicious! 


Pumpkin Maple Pecan Cheesecake Recipe
Adapted from Anne Thornton

Ingredients

Cheesecake:
10 cinnamon graham crackers, finely ground (1 1/3 cups crumbs)
1/4 cup sugar
5 tablespoons butter, melted
3 (8-ounce) packages cream cheese, at room temperature
3 large eggs, at room temperature
1 (15-ounce) can pure pumpkin puree
1 (14-ounce) can sweetened condensed milk
3 tablespoons pure maple syrup
2 teaspoons ground cinnamon
1 teaspoon ground nutmeg
1/2 teaspoon fine sea salt

Maple Pecan Glaze:
1 cup heavy cream
2/3 cup pure maple syrup
3/4 cup pecan pieces

Directions

Preheat the oven to 325 degrees F.

For the crust: Here's a super-easy no-fuss way to make this crust. Break the graham crackers into a food processor with the sugar. Pulse until the crumbs resemble fine meal. Pour the crumbs into a 9-inch springform pan. Pour the melted butter over the mixture, bring together with your fingers and press into the bottom of the pan.

For the cheesecake: In a stand mixer with the paddle attachment, beat the cream cheese on high speed until fluffy. Reduce the speed and, with the mixer running, add the eggs. Increase the speed to incorporate the eggs. Add in the pumpkin puree, sweetened condensed milk and maple syrup. Next, add in the cinnamon, nutmeg and salt. Beat the mixture for awhile; this will make the cheesecake light and fluffy. Pour the pumpkin mixture into the prepared crust. Tap the pan lightly on the work surface to remove any air pockets.

Bake until the center appears nearly set, but jiggles a little when shaken, 1 hour and 15 minutes. Cool for 1 hour. Cover and chill overnight.

For the glaze: In a medium saucepan, combine the cream and maple syrup and bring to a boil. Boil until slightly thickened, 25 minutes, stirring occasionally. Stir in the pecan pieces. Cover and chill. Stir together before serving.

To serve: Spoon the maple pecan glaze over the cheesecake.

Monday, November 4, 2013

Homemade Pop Tarts

Mango Cream Cheese Pop Tarts
These fun pop tarts are like childhood baked into a pastry -- with a grown up twist.  Flaky buttery pastry combined with fruity mango and cream cheese.  These are what pop tarts are suppose to taste like!  Make them for a crowd or keep them in the fridge and reheat in the toaster oven when you need a breakfast on the go.  They're delicious and you know what's in them because you made them!

Therapeutic topic of the week: Why do we crave specific foods?
Studies show that thinking about certain foods can make cravings.  This type of imagination or mental imagery takes up brain power.  You can even be using so much brain power that it can get in the way of you completing a task, making you think: "I have to eat that food".  You can use this same concept the other way as well.  Use a cognitive task to distract you long enough from craving food.  This sometimes happens when you are really busy (or a mom!) and "forget" to eat.
E. Kemps, M. Tiggemann. A Cognitive Experimental Approach to Understanding and Reducing Food Cravings. Current Directions in Psychological Science, 2010; 19 (2): 86 DOI: 10.1177/0963721410364494


Mango Cream Cheese Pop Tarts Recipe
Adapted from Tasting Table

INGREDIENTS
Dough
1½ sticks unsalted butter
1 cup granulated sugar
2 cups all-purpose flour
1½ tablespoons baking powder
¾ teaspoon salt
½ cup buttermilk
1 package (8 ounces) cream cheese

Fruit filling
1 to 2 tablespoons honey
1 tablespoon cornstarch
2 cups canned mango pulp

Sugar Glaze
1 cup confectioners' sugar
2 tablespoons mango pulp
1 tablespoons water
¼ teaspoon vanilla extract
DIRECTIONS

1. Make the dough: In a standing mixer, beat together the butter and sugar until light and fluffy, about 3 minutes. In a medium bowl, whisk together the flour, baking powder and salt. Add the flour and buttermilk into the butter mixture, alternating mixtures until a dough forms. Divide the dough into two balls and wrap in plastic wrap. Chill in the refrigerator for 2 hours.

2. Place the cream cheese between 2 sheets of plastic wrap and roll into a rectangle about ¼-inch thick. Place on a sheet pan and store in the refrigerator until ready to use.

3. Make the fruit filling: In a small bowl, whisk together 1 tablespoon of honey and the cornstarch. In a medium saucepan set over medium heat, combine the mango pulp and cornstarch mixture and cook until the fruit comes to a simmer. Lower the heat and cook until it thickens stirring occasionally, about 10 minutes. Taste for sweetness and add more honey as needed. Remove the filling from the saucepan and chill in the refrigerator until ready to use.

4. To assemble: Remove one dough ball from the refrigerator and place on a lightly floured surface. Roll out to a large rectangle, about ¼-inch thick. Cut the dough into eight 4-inch-by-3-inch rectangles, rerolling the dough if necessary. Place the rectangles on a parchment-paper-lined sheet pan and chill in the refrigerator. Roll out the second ball of dough and cut into slightly larger rectangles. Place the rectangles on a second parchment-paper-lined sheet pan and chill in the refrigerator.

5. Remove the cream cheese from the refrigerator and cut into 2-inch-by-3-inch rectangles. Remove the first set of rectangles from the refrigerator and carefully top each with a cream-cheese rectangle and a tablespoon of the reserved mango filling, leaving a ½-inch border.

6. Use a dab of water to slightly dampen the edge of the dough. Remove the second set of dough from the refrigerator and top the first set of rectangles and fruit with the dough. Seal with a pastry cutter or use a fork dipped in flour to finish the seal. Trim the edges of the dough slightly as needed and chill the pop tarts in the refrigerator for 30 minutes.

7. Preheat the oven to 325°. Place the pop tarts in the oven and bake until golden brown, about 25 to 30 minutes, rotating the pan halfway through baking.

8. Make the sugar glaze: In a small bowl, whisk together the confectioners' sugar, pulp, water and vanilla extract. Whisk in the food coloring if using. Cool the pop tarts on a cooling rack, drizzle with the sugar glaze and serve.


Monday, April 8, 2013

strawberry season

Strawberry Mostachon Cake


A stunning way to celebrate the beginning of strawberry season! The sweet and tart strawberries add freshness to the lightness of the meringue cake. Perfectly balanced with lightly sweetened cream cheese and crunchy walnuts.

Mostachon is a traditional cake from Mexico and it means macaroon in Spanish.  Typically Maria crackers are used in the batter but I substituted vanilla wafers instead.


Therapeutic topic of the week: Treating depression with a specific diet?


It's obvious, what we eat affects how we feel. Food should make us feel good. It tastes great and nourishes our bodies. When eaten in too little or in excessive quantities, however, our health and appearance can be altered, which can create negative feelings toward food.


A recent study published in Nutritional Neuroscience by a group of scientists from the University of Las Palmas de Gran Canaria in Spain determined the effect of the classic Mediterranean diet (with some slight modifications) upon levels of BDNF in patients who suffer with major depression and in those who did not. BNDF is a protein that is responsible for many important brain functions. 


The Mediterranean diet is characterized by the consumption of fruits and nuts, vegetables, legumes, olive oil, cereals and fish, with a low consumption of dairy products and meat, and a moderate intake of alcohol. The nuts chosen for this study are rich in monounsaturated (almonds) and polyunsaturated (walnuts) fatty acids as well as many different antioxidants. Fruits, vegetables, and red wine are rich in polyphenols that exhibit antioxidant and anti-inflammatory properties.


The patients were followed for three years! The reason is that dietary changes often affect brain function rather slowly and the full impact of any diet may take many months to be realized. Patients with prevalent depression who consumed the Mediterranean diet supplemented with nuts showed the greatest increase in blood levels of BDNF. Participants who were not clinically depressed showed no change in their blood levels of BDNF. These results were consistent with prior epidemiological reports of an inverse relationship between a healthy diet and the prevalence of depressive symptoms.

By Gary Wenk, Ph D. author of "Your Brain on Food"


Strawberry Mostachon Cake Recipe
Adapted from Marcela Valladolid

Ingredients
Cake:
Nonstick cooking spray
4 egg whites
1 cup granulated sugar
1 teaspoon vanilla extract
1/2 teaspoon baking powder
Pinch salt
1 cup chopped walnuts
One 11-ounce box of vanilla wafers, chopped
Frosting:
8 ounces (1 cup) cream cheese
1/2 cup sour cream
1/2 cup powdered sugar
1 teaspoon vanilla extract
1 1/2 pounds sliced fresh strawberries, for garnishing

Directions
For the cake: Preheat the oven to 350 degrees F. Spray a 9-inch nonstick springform pan with nonstick cooking spray.

In an electric mixer on high speed, beat the egg whites until soft peaks form. Add the sugar slowly, then the vanilla, baking powder, and salt while beating, about 2 more minutes. Turn the power off and fold in the walnuts and Maria crackers. Transfer to the prepared pan. Bake for 30 to 40 minutes.

For the frosting: In an electric mixer, beat the cream cheese, sour cream, powdered sugar, and vanilla extract until soft peaks form and the mixture is smooth.

To assemble: Remove the cake from the oven. Let cool for 15 minutes. Remove the springform. Using an offset spatula, spread the frosting all over the cake. Garnish with the strawberries and serve.


Tuesday, February 5, 2013

Berry Bagel Puffs

Berry Bagel Puffs


So I have neglected the blog long enough and now I'm getting back into the swing of things.  Recently I have been obsessed with these super soft bagels that are packed with flavor.  And everyone knows, there is nothing more disappointing than a hard chewy bagel.  So I went on a quest to find a bagel recipe that achieved the texture I was looking for.  I found it but gave it a twist to your original bagel by putting the filling inside.

We had some good rain in the past few weeks which helped the berry crop immensely.  Which is why this bagel is filled with fresh blueberries, strawberries and a hint of cream cheese.  The house filled with an intense aroma of sweetness and the taste was incredible.  The purple berry filling oozing out of the top ensures you will get a delicious bagel puff.  It's the perfect breakfast on the go and the kids will eat it up too.  Berry bagel puffs are a fine line between inventive and traditional and that's what makes them so irresistible. 

Berry Bagel Puffs Recipe

INGREDIENTS
1 1/2 cups warm water
2 tablespoons plus 2 teaspoons sugar
One 1/4-ounce package dry active yeast
2 tablespoons sugar, plus 2 teaspoons
1 1/2 cups warm water
4 1/4 to 4 1/2 cups all-purpose flour, plus more for kneading
2 teaspoons kosher salt
8 ounces fresh strawberries, chopped
6 ounces fresh blueberries
8 ounces cream cheese, softened
2 tablespoons Mary-Yum's jam or store bought jam
1 large egg
2 tablespoons turbinado sugar

DIRECTIONS
Combine the water, sugar and yeast iIn the bowl of a stand mixer fitted with the paddle attachment, combine the yeast, sugar, and warm water. Allow to stand until bubbly, about 5 minutes. Add 2 cups flour, the salt, and mix on low speed until well combined, about 2 minutes. Switch to the dough hook attachment. Add the remaining flour gradually and mix on low speed until fully incorporated, about 4 minutes. Turn dough out onto a lightly floured surface. Knead until the dough is heavy, smooth, and not sticky, about 5 minutes. Lightly oil a bowl, place the dough in the bowl, cover loosely and set aside to rise until doubled, about 1 hour.

In a medium bowl, combine the strawberries and blueberries. Add the softened cream cheese and strawberry jam and mix until well combined. Set aside.

Heat oven to 375 degrees F. Divide dough into 12 pieces. Cook Tip: To portion the dough evenly roll the dough into a log shape. Cut the log shaped dough in half, then cut the two halves in half leaving you with 4 equal pieces. Cut those pieces into thirds which will give you 12 even portions. Take one piece of dough and flatten it into a 4 inch circle. Place 2 1/2 tablespoons cream cheese mixture (or filling variation - see below) in the center. Fold up the ends of the dough and pinch closed like an empanada or potsticker. Tuck the ends into the center and twist to form a nice ball. Be careful not to make the bottom of the roll a lot thicker than the top to keep the dough even around the filling. Place the roll, seam side down, on a baking sheet lined with parchment paper. Repeat with the remaining rolls. Beat the egg in a small bowl with 1 tablespoon water. Brush the rolls with the egg wash and sprinkle with turbinado sugar. Bake in the preheated 375 degrees F oven until golden brown, 20 to 22 minutes. Allow to cool prior to serving Add one 6-ounce package blackberries, sugar, instant tapioca and water to a small saucepan. Bring to a boil over medium heat and cook until saucy, about 10 minutes. Remove the syrup off the heat. Put the remaining blackberries into a large bowl and pour the syrup. Toss to combine and set aside to cool prior to filling bagel dough.


Wednesday, November 14, 2012

Fig and Mint Tart

Fig and Mint Tartlet
This deliciously satisfying, elegant miniature tart has a cream cheese and honey filling and topped with fresh figs, mint and pistachios.  Figs are thought to have been first cultivated in Egypt. They spread to Ancient Greece and Rome were later introduced to other regions of the Mediterranean by ancient conquerors and then brought to the Western Hemisphere by the Spaniards in the early 16th century. In the late 19th century, when Spanish missionaries established the mission in San Diego, California, they also planted fig trees.

Enjoy the flavors of  fall?  Try my pumpkin french toast!


Therapeutic topic of the week: 
by Marc David, founder of the Institute for the Psychology of Eating

The key to understanding the profound link between metabolism and stress is the central nervous system (CNS). The portion of the CNS that exerts the greatest influence on gastrointestinal function is called the autonomic nervous system (ANS). This aspect of the nervous system is responsible for getting your stomach churning, the enzymatic secretions in the digestive process flowing, and keeping the dynamic process of nutrient absorption into the bloodstream on the move. The ANS also tells your body when not to be in digesting mode, such as when there’s no food in your belly or when you’re in fight-or-flight response.

Two subdivisions of the ANS help it accomplish its dual task of digestive arousal and digestive inhibition: the sympathetic and parasympathetic branches. The sympathetic branch activates the stress response and suppresses digestive activity. The parasympathetic branch relaxes the body and activates digestion. It might be helpful to think of these two parts of the nervous system as on-and-off switches.

Simply put, the same part of our brain that turns on stress turns off digestion. And conversely, the part of the brain that turns on the relaxation response turns on full, healthy digestive power. Eating healthy food is only half of the story of good nutrition. Being in the ideal start to digest and assimilate food is the other half.

Here’s a favorite client story of mine that will help make things a little more practical when it comes to the stress/digestion connection:

Chen, a charismatic forty-six-year-old doctor of Chinese medicine, was plagued by nagging digestive upset despite overall great health and a vast knowledge of natural healing. He felt that maybe it was time to look at his diet and requested my help. When I asked some basic questions about his eating habits, I was quite surprised by the answer. Chen would stop at McDonalds on his way to work and eat two Egg McMuffins for breakfast in the car while rushing through city traffic. For lunch he’d zip to the same McDonalds and eat two Big Macs in the car as he drove back to the office. After work, he ate two slices of pizza. Chen informed me that he wanted to feel better but he wasn’t willing to cook, bring a lunch to work, eat vegetables, or give up McDonalds. Go figure.

I told him I suspected I could actually help him despite the impossible limitations he was giving me to work with. Here is the simple strategy to which Chen reluctantly agreed. He had to eat his Big Macs while the car was parked and take twenty minutes to enjoy them slowly and sensually. I asked him to do the same with his Egg McMuffins at breakfast. He needed to take time to slow down with food, and with life. He needed to breathe deeply before, during, and after his meals.

Two weeks later Chen called me in an excited state with some wonderful news to tell. First, his digestive symptoms had disappeared. And then he said, “You won’t believe this, really, but I hate Big Macs. I’ve been eating them for fifteen years and I can’t stand them. Have you ever tried to savor a Big Mac? You can’t. You have to eat it fast and smother it with lots of ketchup to hide the taste.”

Chen was not a relaxed eater. He had plenty of patients to see throughout the day and seemingly little time for self-nourishment. The simple act of taking time to slow down and eat shifted him from sympathetic to parasympathetic dominance, and his digestive upset quickly disappeared. When this happened, his body wisdom was finally able to give him feedback about his food choices, and he subsequently gave up Big Macs naturally and effortlessly. He didn’t need to use his willpower to resist a favorite food or exert mental force to make better choices. All he did was savor a Big Mac.

Are you beginning to understand the metabolic power of relaxation? Can you see how eating in the natural and necessary state of parasympathetic dominance can yield breakthroughs with food and metabolism?


Fig and Cream Cheese Tartlette Recipe

INGREDIENTS
1 lb my homemade or store-bought pastry dough
All-purpose flour, for dusting
1 cup whipping cream
3/4 cup (5 1/2 oz) cream cheese
3 tbsp of honey
1 tbsp orange juice
12 to 16 figs, each cut into 6 pieces
Handful of green shelled pistachios, halved
1 bunch of fresh mint, ripped or roughly torn
Special equipment: miniature round tartlette fluted pans

DIRECTIONS
Preheat the oven to 350 degrees F.

Roll out the pastry on a floured counter to the thickness of a 1/4 inch and use it to carefully line the pan. Homemade pastry is will be quite crumbly. Don't worry, you can patch it together in the pan. Press the a plastic straw against the pastry all round the edges to coax it into the fluted grooves. Trim off the excess around the top. Put in the refrigerator for about 15 minutes, or until firm.

Remove the tart from the refrigerator. Take a piece of parchment paper slightly larger than the pan and scrunch it up, then unscrunch it and line the pan with it. Fill it with pie weights or dried beans and "blind bake" in the oven for 20 to 25 minutes. Remove the paper and bake for an additional 5 minutes. Remove from the oven and set aside.

For the filling, put the cream in a bowl and whip until beginning to thicken, then fold it into the cream cheese and mix with the honey and juice. Put the filling in the tart case, then arrange the figs on top and scatter over the nuts and mint.

Tip: This tart is best eaten on the day it is made.

Adapted from Lorraine Pascale


Thursday, October 18, 2012

P is for pumpkin

Pumpkin Cake Roulade

This easy dessert is a great way to try out baking with pumpkin if you have never tried it before.  The pumpkin flavor is just right and does not take over the dish.  Macadamia nuts add a delicious buttery crunch.

Pumpkins are rich in vitamin A and boast a unique mix of both antioxidants and anti-inflammatory agents. They protect the immune system as well as the cardiovascular system, including the fine blood vessels of the brain. It also plays a role in regulating the kind of cell-to-cell communication that keeps cancer in check. Pumpkins are also a great source of potassium, making them a food useful in controlling hypertension and preserving healthy brain function by yet another means.

Therapeutic topic of the week:
Dealing with excess candy.  They're everywhere, you just can't ignore it---from the pumpkin patches on the side of the road to the array of pumpkins lined outside the grocery store, pumpkins are here.  Along with pumpkins come all that candy.  As an adult, the sales urge me to buy candy when normally I wouldn't.  As a parent, when my child comes home with sixty pieces of candy I wonder how to discourage him from eating it.  I can't help but wonder, is all this candy really necessary?

According to a study in the Journal of Education and Behavior conducted at Yale, 284 children between three and 14-years old were given the option of lollipops, fruit-flavored chewy candies, fruit flavored crunchy wafers, and sweet and tart hard candies, or stretch pumpkin men, large glow-in-the-dark insects, or Halloween theme stickers and pencils. Half the children chose the toys. This shows that kids may define the notion of "treat" much more broadly than many of us do.  The key here is to have our children understand that there are rewards other than food.  We also don't want to have such strict candy rules that they hide all half the candy under their bed and binge when they're at school.  Not only are these unhealthy habits, they may grow into adulthood with issues related to food.  Understand that food can be used as comfort to sooth ourselves.  Be creative and teach our children about other treats that don't revolve around eating.

Eating candy as an adult whether you have children or not during this time can be a challenge.  Dr. Judith Beck has a few suggestions  to survive through the season.

Remember: Candy is available year-round!  Drug stores and supermarkets sell fun-sized candy bars year-round, so you don't need to load up now. You can buy candy any time.

Don't buy candy until you need it. Even if it adds a small amount of cost or an additional chore on your already busy October 31st, isn't it worth not having to worry about giving in and expending the mental energy to resist until it's time?

Buy candy that you don't like so much in bulk and just a single serving of your favorite candy. You'll obviously have the most trouble resisting your favorite candy, so buy candy in bulk that you don't enjoy as much-you'll have an easier time resisting it. You can and should buy a single-serving of the candy you like the most. This way, you'll be able to savor your favorite candy without worrying about having to stop yourself from going back for more.

Get rid of left overs! Give them away, donate them, bring them in to work, or simply throw them away. If you have the sabotaging thought, "I can't throw the candy away because it would be a waste of money," remind yourself, "Either way the money is already gone. Eating the candy won't bring it back." One way or another, if you can limit your amount of exposure to leftover candy, you'll make it so much easier on yourself. 


Pumpkin Cake Roulade Recipe 

Ingredients
3/4 cup plus 2 Tbsp. powdered sugar, divided
3/4 cup flour
1-1/2 tsp. pumpkin pie spice
1 tsp. Baking Powder
1/4 tsp. salt
3 eggs
1 cup granulated sugar
3/4 cup canned pumpkin
1 cup chopped macadamia nuts
4 oz. (1/2 of 8-oz. pkg.) Cream Cheese, softened
1-1/2 cups thawed Whipped Topping

Directions
HEAT oven to 375°F.

GREASE 15x10x1-inch pan; line with waxed paper. Grease and flour waxed paper. Sprinkle clean towel with 1/4 cup powdered sugar.

MIX flour, spice, baking powder and salt. Beat eggs and sugar in large bowl with mixer on high speed until thickened. Add pumpkin; mix well. Add flour mixture; beat just until blended. Spread onto bottom of prepared pan; sprinkle with nuts.

BAKE 15 min. or until top of cake springs back when touched. Immediately invert cake onto towel; remove pan. Carefully peel off paper. Starting at one short side, roll up cake and towel together. Cool completely on wire rack.

BEAT cream cheese and 1/2 cup powdered sugar in medium bowl with mixer until well blended. Add whipped topping; mix well. Carefully unroll cake; remove towel. Spread cream cheese mixture over cake. Reroll cake; wrap in plastic wrap. Refrigerate 1 hour. Unwrap and sprinkle with remaining powdered sugar just before serving.

Adapted from Kraft


Thursday, June 21, 2012

Red Velvet, White and Blue

Red Velvet Cupcakes with Cream Cheese Frosting

Did you know that in World War II, bakers used boiled beets to enhance the color of their red velvet cakes?  The reddish-brown color of the cake was originally from a reaction of the cocoa powder with  buttermilk. Now however, red food coloring is added.  Arrange the cupcakes in the shape of a flag for the 4th of July -- great idea for a star-spangled celebration!

Stress relief tip of the day:
Understand stress. When stress overwhelms your nervous system your body is flooded with chemicals that prepare you for “fight or flight”. While the stress response can be lifesaving in emergency situations where you need to act quickly, it wears your body down when constantly activated by the stresses of everyday life. The relaxation response puts the brakes on this heightened state of readiness and brings your body and mind back into a state of equilibrium.


Red Velvet Mini-Cupcakes with Cream Cheese Frosting Recipe
Makes about 80-81 miniature cupcakes

Ingredients
Cupcakes:
2 cups all-purpose flour, sifted
1/2 cup cake flour, sifted
4 tablespoons unsweetened Dutch-process cocoa powder
1 teaspoon salt
1 1/2 cups sugar
1 1/2 cups vegetable oil
2 large eggs, room temperature
1 tablespoon red food color
1 teaspoon pure vanilla extract
1 cup buttermilk
1 1/2 teaspoons baking soda
2 teaspoons distilled white vinegar

Cream Cheese Frosting: 
2 (8 ounce) packages cream cheese, softened
1/2 cup butter, softened
2 cups sifted confectioners' sugar
1 teaspoon vanilla extract


Directions
Preheat oven to 350 degrees. Line miniature muffin tins with paper liners. Whisk together flour, cake flour, cocoa, and salt.

With an electric mixer on medium-high speed, whisk together sugar and oil until combined. Add eggs, one at a time, beating until each is incorporated, scraping down sides of bowl as needed. Mix in food color and vanilla.

Reduce speed to low. Add flour mixture in three batches, alternating with two additions of buttermilk, and whisking well after each. Stir together the baking soda and vinegar in a small bowl (it will foam); add mixture to the batter, and mix on medium speed 10 seconds.

Divide batter evenly among lined cups, filling each three-quarters full. Bake, a cake tester inserted in centers comes out clean, about 11-12 minutes. Transfer tins to wire racks to cool completely before removing cupcakes. Cupcakes can be stored overnight at room temperature, or frozen up to 2 months, in airtight containers.

For the frosting, in a medium bowl, cream together the cream cheese and butter until creamy. Mix in the vanilla, then gradually stir in the confectioners' sugar. Store in the refrigerator after use.

To finish, use a piping bag with a large round tip and squeeze out a dollop of frosting.  Use one color of small round sugar nonpareils to garnish the rims of the cupcake for an intense effect.


Cupcakes adapted from Martha Stewart


Friday, March 30, 2012

Whoop whoop whoopie pie

Carrot Cake Whoopie Pie

Soft and fluffy carrot cake sandwiched in between a lightly sweetened honey cream cheese filling.  This creative twist on a whoopie pie is worth the effort.


Stress relief tip of the day:
Turn up the jams.  The 2011 American Psychological Association's "Stress in America" report was released on January 11, 2012.  It is obvious that adults manage their stress in a variety of ways.  Some of the most common techniques in this report include listening to music (48 percent), exercising or walking (47 percent), reading (42 percent), spending time with friends or family (39 percent) and napping (34 percent).  Remember, the key is finding a stress management technique that suits you.  How much do you know about stress? Take this simple quiz to test your "stress smarts."


Carrot Cake Whoopie Pie Recipe
INGREDIENTS

Cookie Batter
2 sticks unsalted butter, softened
1 cup light brown sugar
1 cup granulated sugar
2 eggs
¾ teaspoon vanilla extract
2 cups all purpose flour
1 teaspoon baking soda
1 teaspoon baking powder
¼ teaspoon salt
1 teaspoon ground cinnamon
½ teaspoon freshly grated nutmeg
½ tablespoon crystallized ginger, finely chopped
2 cups old-fashioned oats
1½ cups of peeled and grated organic carrots

Cream Cheese Icing
2 sticks unsalted butter, softened
1¼ cups powdered sugar
2 tablespoons honey
12 ounces cream cheese, cut into pieces, softened

DIRECTIONS

1. Make the cookies: In the bowl of a standing mixer, beat together the butter with the brown sugar and granulated sugar until lightened, about 3 minutes. Slowly add the eggs one at a time, beating the yolk of the first egg until it's incorporated before adding the second egg. Stir in the vanilla.

2. In a medium bowl, combine the flour, baking soda, baking powder, salt, cinnamon, nutmeg and ginger. Slowly mix the dry ingredients into the wet, then gently stir in the oats and carrots. Wrap the dough in plastic wrap and refrigerate for at least six hours or up to overnight.

3. Preheat the oven to 325°. Scoop rounded tablespoons of the dough for larger cookies (or teaspoon size for miniature ones) onto a parchment-lined sheet pan and bake for 10 to 12 minutes until lightly browned and set.  Keep cookies spaced far apart because the batter tends to spread.  Remove from the oven and set the cookies aside to cool, then transfer to a cooling rack.

4. Make the icing: In the bowl of a standing mixer, beat together the butter and sugar until light and fluffy, about 3 minutes. Slowly beat in the honey and cream cheese until incorporated. Spoon the frosting into a piping bag and pipe the frosting onto half of the cookies; place the other cookies on top to create sandwiches. Serve immediately or store the cookies and frosting separately for up to 3 days.

Adapted from Tasting Table


Tuesday, July 26, 2011

Homemade Ice Cream

Strawberry 'n Cinnamon Ice Cream


Although it is not a popular combination, the heat from the cinnamon and tartness of the strawberries work really well together.  Creamy, smooth ice cream with sweet strawberries and a hint of cinnamon you can feel at the back of your throat.  It's truly an indulgent experience.  The secret is the low-fat cream cheese to achieve the creamy consistency with less fat than cream.


Strawberry 'n Cinnamon Ice Cream Recipe

Sunday, June 19, 2011

Father's Day Treat

Blueberry Cream Cheese Tart

My dad loves fruit tarts, so every year at Father's Day I am always trying to make one better than the last.  This one is made from fresh organic blueberries and sweetened cream cheese with a thin layer of chocolate on the bottom crust.  It made his day.  Mission accomplished.


Blueberry Cream Cheese Tart Recipe

Ingredients:

Tart Shell:
2 cups bleached all-purpose flour 
2 sticksunsalted butter, chilled and cut into 1/2-inch cubes
1/2 teaspoon salt
6 to 8 tablespoons ice water

For the ganache:
2 oz. semisweet chocolate chips
¼ cup heavy cream
1 tbsp. unsalted butter, at room temperature

For the filling:
8 oz. cream cheese, softened
½ cup confectioners’ sugar, sifted
½ tsp. vanilla extract
2 tbsp. milk

For topping:
1/2 pint fresh organic blueberries
Melted semisweet chocolate, for drizzling

Directions:

Place the flour, butter, and salt in a food processor fitted with a steel blade. Pulse about 24 times, then open the machine and lift a handful of crumbs. The largest pieces of butter should be the size of raw grains of rice or barley. If there are larger pieces, continue to pulse the mixture. When the butter pieces are the correct size, transfer the mixture to a large mixing bowl. Sprinkle 6 tablespoons of ice water onto the dough. Spread the fingers of one hand as if you were about to grab a large ball, and using your rigid fingertips as if they were a large fork, stir the dough quickly and briefly until the liquid is incorporated. Squeeze a handful of the dough in your palm. The dough should have just enough moisture to stay together. Break the piece in half. If it seems dry and crumbly, cautiously add more water a few teaspoons at a time until you can squeeze it into a ball that will not crumble when broken apart. If your kitchen is reasonably cool, the butter was cold, and you used ice water, the dough should be at just the right stage of malleability for rolling out, and it will be easiest to work with immediately. If your kitchen is very warm, wrap the dough in plastic wrap and refrigerate it for about 15 minutes.
Turn the pastry dough out on a lightly floured board and shape into a disk and dust the top lightly with flour. Begin to roll out the dough, using quick but gentle strokes with the pin. Start with the pin in the middle of the round and roll to the top, then to the bottom. Rotate the dough 1/4 turn each time you roll to be sure the dough is not sticking and use additional flour as necessary. When the round is larger than 12 inches and about 1/8 inch thick, roll dough onto rolling pin, then unroll onto tart pan. Push dough into tart shell  firmly and then freeze for 30 minutes.

Preheat the oven to 375°F.  Lay a large piece of foil over the dough and press firmly.  Bake the tart shell for 15 minutes, then reduce the heat to 350°F and continue to bake until it is an even golden brown, 8 to 12 minutes longer. Lift a shell with a spatula and check that the underside is evenly brown. If the tart shells puff up during baking, press down the center of the pastry with the back of a large spoon. Remove foil from dough and bake another 5 minutes until golden.  Remove from oven and allow to cool completely. 

To make the ganache, place the chocolate in a heatproof bowl.  Bring the cream to a simmer in a small saucepan.  Remove from the heat and pour over the chocolate.  Let sit 1-2 minutes to melt the chocolate.  Whisk together until a smooth ganache forms.  If there are still bits of unmelted chocolate, microwave in 10 second intervals, whisking in between, until the ganache is completely smooth.  Whisk in the butter.  Spread the ganache in a thin even layer over the bottom of the cooled tart shell.  Allow the ganache to set before proceeding.

To make the filling, beat together the cream cheese and confectioners’ sugar in a bowl on medium-high speed until smooth.  Blend in the vanilla and milk or cream.  

Spread the cream cheese mixture over the cooled ganache in the tart shell.Starting from the outside and working toward the center, place the sliced blueberries in concentric circles slightly overlapping each other.  Gently press the berries into the cream cheese mixture to help keep them in place.  Drizzle with melted chocolate, if desired.  Chill until ready to serve.

Adapted from Epicurious and Annies Eats


Sunday, June 5, 2011

Summertime with a P.C.C

P.C.C (Pina Colada Cupcake)

Moist pineapple based cupcake with coconut baked into the batter topped with a toasted coconut cream cheese frosting.


picasa thingy