Thursday, March 19, 2015

meyer lemon madeleines


Madeleines are the perfect little tea cookies.  You can argue that they aren't even cookies they are more like cakes.  Whatever they are they're pretty damn good and even better with fresh Meyer lemons.  Meyer lemons taste like an orange and a lemon had a love child.  A little tart and a little sweet, it makes for the perfect citrus fruit to add to your pastry.

Occasionally I get a box of organic fruits and vegetables delivered to my house from local farms.  It helps me try new ingredients and understand which types of produce are seasonal.  Meyer lemons have such a short window when they are ripe enough to eat and they spoil even quicker.  As soon as the delivery box came, I knew I didn't have much time but I knew exactly what I wanted to make.  Delicate little cookie cakes with an extra sugar coating.  This cookie will please the pickiest of eaters.


Meyer Lemon Madeleine Recipe
From Tutti Dolci

Ingredients

Madeleines
3/4 cup flour
1/3 cup sugar
1 Tbsp brown sugar
1/2 tsp baking powder
Pinch of salt
Zest of 1 Meyer lemon
2 large eggs, lightly beaten
1 Tbsp honey (I used orange blossom honey)
1/2 tsp vanilla extract
5 Tbsp unsalted butter, melted and cooled

Glaze
2/3 cup powdered sugar, sifted
1 tsp Meyer lemon zest
2 Tbsp fresh lemon juice

Whisk together flour, sugars, baking powder, salt, and lemon zest in a medium bowl. Whisk together eggs, honey, and vanilla in a small bowl. Add egg mixture to flour mixture and stir just until combined. Add melted butter and mix slowly but thoroughly until smooth. Cover and chill in the refrigerator for 1 hour or up to a day.

Preheat oven to 350°F and spray a standard-size madeleine pan with nonstick spray; use a pastry brush to brush the inside of each mold. Spoon batter into molds, filling each about 3/4 full. Bake for 8 to 9 minutes, until cakes are pale gold and spring back to the touch. Immediately shake madeleines out over a clean dish towel; let cool.

To prepare glaze, whisk together powdered sugar, lemon zest, and juice in a small bowl. Use a pastry brush to glaze scalloped side of each baked madeleine. Store leftovers in an airtight container at room temperature up to 2 days.


Sunday, March 8, 2015

baked french toast


This is one of those prepared recipes I had in the freezer.  Pull it out on your lazy Sunday and voila!  My daughter literally could not keep her hands off of it.  If this toast is French, then I want dual citizenship.  Recipe below after the therapeutic topic of the week.

Theraputic topic for the week:  daily affirmations
Many times we find people putting themselves down.  It is almost as if they are convincing themselves of things that aren't true.  This could be for a number of different reasons.  Certain life experiences can decrease self esteem or maybe we were never encouraged to believe that we could achieve what we wanted.  Increasing your confidence takes time and you can start by using daily affirmations.  You can read the list I have below every morning when you wake up.  Sometimes I suggest that people create their own if these ones don't speak to them.  Personal affirmations are the best way to increase self esteem and remind yourself that you are worthy of the same things that others are.  So here is the list.  Please share with others if you find it helpful.

Daily Affirmations

In this space, and in this time, I am an essential person to the world.

My journey in life is unique - it is MY journey.

I deserve to be loved by myself and by others.

I have ample leisure time without feeling guilty.

As a citizen of the world, I deserve love, peace, prosperity and serenity.

I am not alone. There are people who understand me.

I love myself unconditionally.

I can respect my rights and the rights of others.

It’s okay to ask for help today.

Just for today, I will be glad to have feelings - happy, sad, depressed… whatever - because I’m human.

Just for today, I will respect my own and other’s boundaries.

Just for today, I will take one compliment and hold it in my heart for more than just a fleeting moment. I will let it nurture me.

Just for today, I will act in a way that I would admire in someone else.

Just for today, I will make decisions that will feel good tomorrow.


Baked French Toast Recipe

Ingredients

For the french toast:
Butter, For Greasing
1 loaf Crusty Sourdough Or French Bread
8 whole Eggs
2 cups Whole Milk
1/2 cup Heavy Cream
1/2 cup Sugar
1/2 cup Brown Sugar
2 Tablespoons Vanilla Extract

For the topping
1/2 cup Flour
1/2 cup Firmly Packed Brown Sugar
1 teaspoon Cinnamon
1/4 teaspoon Salt
Freshly Grated Nutmeg (optional)
1 stick Cold Butter, Cut Into Pieces
Warm Syrup, For Serving
Butter, For Serving


Directions
For the French toast: Grease the baking pan with butter. Tear the bread into chunks, or cut into cubes, and evenly distribute in the pan. Crack the eggs in a big bowl. Whisk together the eggs, milk, cream, granulated sugar, brown sugar and vanilla. Pour evenly over the bread. Cover the pan tightly and store in the fridge until needed (overnight preferably). Or you can make it and bake it right away---delicious no matter what!


For the topping: Mix the flour, brown sugar, cinnamon, salt and some nutmeg in a separate bowl. Stir together using a fork. Add the butter and with a pastry cutter, and mix it all together until the mixture resembles fine pebbles.


Store in a plastic bag in the fridge.  (This is the point I would store it in the freezer until a lazy Sunday!)


When you're ready to bake the casserole, preheat the oven to 350 degrees F. Remove the casserole from the fridge and sprinkle the topping over the top. Bake for 45 minutes for a softer, more bread pudding texture or for 1 hour-plus or more for a firmer, crisper texture.

Scoop out individual portions. Top with butter and drizzle with warm pancake syrup and powdered sugar (as if there isn't enough!).


Friday, February 13, 2015

Chocolate chip cookies

I love using local products and supporting regional businesses.  I went to this new chocolate shop in Irvine, Orange County called Choxco.  


They offer a concept called "bean to bar" for all of their chocolate and I must say it really makes all the difference.  


Having the beans roasted onsite seems to really pull out an extraordinary flavor and makes even a regular chocolate chip cookie seem special.


I went with my kids to their grand opening celebration with free samples of hot chocolate, tasting chocolate and bar chocolate.  It also included a guided tour of the facility.  To my understanding large groups can call in and schedule a tour of the facility as well.


They have all sorts of specialty chocolates and most of them were organic.


The hot chocolate is divine.


The flavor of the chocolate is so delicious.  I can't wait to try this chocolate in a brownie.  This is the recipe I use to freeze cookie dough balls which I later pull out whenever I want a fresh cookie and indulge.

The Local Chocolate Chip Cookie Recipe

INGREDIENTS
2 ⅛ cups white all-purpose flour
½ tsp. kosher salt
½ tsp.baking soda
12 tbsp. unsalted, European-style butter (for best results)
1 cup light brown sugar, packed
½ cup white sugar
1 large egg
1 large egg yolk
2 tsp. vanilla extract
2 cups local semisweet chocolate chips

Directions

1. Preheat oven to 325°, with racks set in the middle of the oven.

2. In a medium mixing bowl, sift together flour, salt, and baking soda. In a stand mixer, cream together butter and sugars until thoroughly blended. Add egg, egg yolk, and vanilla, and mix to incorporate. Add dry ingredients to the bowl with the wet ingredients and mix until just combined. Gently fold in chocolate chips.

3. Divide dough into 1/4 cup portions; roll into balls (you can freeze the balls and store in a freezer bag at this point), transfer to parchment-lined cookie sheets. Bake for about 15 minutes, rotating the pans halfway through. When fully cooked, the outer edges of the cookies should be golden and slightly crisp, while the middle should still be slightly soft.


Tuesday, February 3, 2015

Blackberry lemon sweet rolls


Now that I've become busier with the two kids, homework, tantrums and a job; I find myself making dishes and freezing them when I have time to cook.  I love this sweet roll recipe because you can substitute any berry you like and freeze it!  

I've been cooking ahead and freezing all sorts of things like meatballs, lasagna, casseroles, baked french toast, empanadas, croissants, cookies and ground beef.  I assemble them in different size disposable foil pans or plastic freezer bags and reheat for a meal on a weeknight or entertaining guests on the weekend.

You can freeze the blackberry lemon sweet rolls with the dough unrisen or already cooked, iced and reheated.  It will turn out delicious either way or if you can't resist the temptation just eat it right away!

Blackberry Lemon Sweet Rolls Recipe
Barely adapted from Ree Drummond

Ingredients

FOR THE DOUGH:
4 cups Whole Milk
1 cup Sugar
1 cup Canola Oil
2 packages Active Dry Yeast, 0.25 Ounce Packets
8 cups All-purpose Flour
1 cup (additional) All-purpose Four
1 Tablespoon Salt
1 teaspoon Baking Soda
1 teaspoon Baking Powder

FOR THE FILLING:
1 stick Butter
3/4 cups Sugar
2 whole Lemons, Zested
2 cups Fresh Blackberries

FOR THE GLAZE:
1 whole Lemon, Juiced
2 whole Lemons, Zested
3 cups Powdered Sugar
2 cups Whole Milk, Or As Needed
1 dash Salt
3 Tablespoons Melted Butter


Directions

For the dough:
Mix milk, 1 cup sugar, and canola oil in a large pot or Dutch oven. Heat over medium heat until very warm but not boiling. Remove from heat and allow to cool until warmer than lukewarm but not hot.

Sprinkle yeast over the surface of the liquid, then add in 8 cups flour. Stir gently until totally combined. Mixture will be very wet and sticky. Cover with a tea towel, keep in a draft-free place, and allow to sit for 1 hour.

After 1 hour, add in an additional cup of flour, as well as the salt, baking soda and baking powder. Mix until combined. Refrigerate dough, covered, until you need it. (Refrigerating the dough helps make it easier to handle.)

Preheat oven to 375 F. Butter a large baking dish (or a couple of smaller dishes) generously. you could use a 9x13 or two 9-inch pie pans which is what I did.

Melt 1 stick of butter in a small saucepan over medium heat. Once melted remove from heat.

Divide dough in half. Store one half in the fridge for another batch of these. Turn the other half of the dough onto a floured surface. Roll into a large rectangle, about 30 inches wide by 10 inches deep. Roll as thin as possible! Drizzle melted butter over the dough, using your fingers to spread evenly.

Using your fingers, mix sugar and lemon zest so that it's a nice, light yellow sugar. Sprinkle it all over the butter. Sprinkle the blackberries evenly over the surface.

Beginning at the side furthest from you, roll dough toward you until it’s in the shape of a tight log. Tuck as you go so the roll stays tight. Pinch the edges to seal the seam shut. With a sharp knife, slice into 1/2 thick hick rolls and lay the slices, cut side down, into the buttered baking dishes. 

(You can freeze it from here and then continue the process when you thaw it or you can continue this process and freeze when it is baked and glazed.)

Allow to rise for 20 minutes, then place in oven and bake for 15 to 20 minutes, or until deep golden brown on top.

To make the glaze: Add lemon juice, lemon zest, powdered sugar, milk, and dash of salt in a bowl. Add melted butter and whisk together until smooth. Taste it and add more of whatever it needs.

Remove rolls from oven and drizzle the glaze all over the rolls. Be sure to get it all around the edges and covering the surface so they’ll be nice and moist!  (You can also freeze it at this point and just reheat after it thaws.)

Serve warm or at room temperature.


Friday, January 16, 2015

Lemon Meringue Pie


If you love lemons then this is the pie for you.  Pillowy meringue on top of tart and sweet homemade lemon curd.  The perfect end to any stressful day.


Lemon Meringue Pie Recipe

Ingredients:
Basic pie dough for a single-crust pie (see recipe here), rolled into a 12-inch round 1/8 inch thick
8 large eggs
2 cups plus 2 Tbs. sugar
1/4 cup cornstarch
1 cup fresh lemon juice
1/4 tsp. fine sea salt
4 Tbs. unsalted butter, cut into tablespoons
Finely grated zest of 3 lemons

Directions:
Place the dough round in a 9-inch pie dish, fitting it into the bottom and sides. Trim the dough, leaving a 3/4-inch overhang. Fold the overhang under, then flute the edge. Using a fork, pierce the dough all over, then line with aluminum foil and freeze for 30 minutes. Meanwhile, position a rack in the lower third of an oven and preheat to 375°F. Place the dough-lined dish on a baking sheet and fill the foil with pie weights. Bake until the dough looks dry and is barely golden, 12 to 15 minutes. Remove the foil and weights. Continue baking until the crust is golden brown, 12 to 15 minutes more. Transfer to a rack and cool while you make the filling. Raise the oven temperature to 400°F.

In a bowl, beat 3 of the eggs until blended. Separate the remaining 5 eggs, adding the yolks to the beaten whole eggs and putting the whites in a separate large bowl. Cover the whites and set aside at room temperature. Beat the yolks into the beaten eggs. In another bowl, whisk together 1 1/2 cups of the sugar and the cornstarch, then whisk in the beaten eggs, the lemon juice and salt. Transfer to a heavy, nonreactive saucepan, place over medium heat and heat until the mixture comes to a full boil, whisking almost constantly. Reduce the heat to low and let bubble for 30 seconds. Be careful not to undercook or overcook the filling or it will separate as it cools. Remove from the heat and whisk in the butter. Strain through a coarse-mesh sieve into a bowl to remove any bits of cooked egg white. Stir in the lemon zest, then pour into the baked crust (the crust can be warm or cool).

Using a handheld mixer on high speed, beat the reserved egg whites until soft peaks form. One tablespoon at a time, beat in the remaining 1/2 cup plus 2 Tbs. sugar, beating until the egg whites become a meringue with stiff, shiny peaks. Using a rubber spatula, spread the meringue evenly over the hot filling, making sure the meringue touches the crust on all sides (to prevent the meringue from shrinking). Swirl the meringue with the spatula to form peaks. Bake until the meringue is browned, about 5 minutes. Transfer to a rack and cool completely before serving, at least 3 hours. Serves 8.

Wednesday, January 7, 2015

Chocolate Almond Biscotti


Is it bad that I'm still in vacation mode?  I've been so lazy and sleepy.  It's time to snap back into it! Over the holidays we spend a lot of time with family and make use of the vacation time.  Every year our family has a tradition of going to the Newport Beach Christmas Boat Parade while sipping hot chocolate and eating homemade cookies.


We bundle up, grab our lawn chairs and try to get a good spot along the parade route.  There are boats of all sizes...small motor boats to huge yachts each lit and decorated to celebrate.  Some have guests on board enjoying loud music and festive snacks.  It's a happy and cozy time of year and we look forward to going with the kids.

Last year I made shortbread dipped in chocolate, which is simply divine also.  A variation to this recipe was my flaky Chocolate Hazelnut Shortbread which you can find here.


Chocolate Almond Biscotti Recipe
Barely Adapted From David Lebovitz

Remember: for best results you should weigh your ingredients.

Ingredients
For the biscotti:
2 cups (280g) flour
3/4 cups (75g) cocoa powder
1 teaspoon baking soda
1/4 teaspoon salt
3 large eggs, at room temperature
1 cup (200g) sugar
1 teaspoon vanilla extract
1/2 teaspoon almond extract
1 cup (125g) slivered almonds, toasted, chopped
3/4 cups (120g) mini chocolate chips

For the glaze:
1 large egg
2 tablespoons coarse sugar

Preheat the oven to 350F  degrees.

In a small bowl, sift together the flour, cocoa powder, baking soda, and salt.  In a large bowl, beat together the 3 eggs, sugar, and vanilla & almond extracts. Gradually stir in the dry ingredients, then mix in the nuts and the chocolate chips until the dough holds together.

Line a baking sheet with parchment paper or a silicone mat. Divide the dough in half. On a lightly floured surface, roll the dough into two logs the length of the baking sheet. Transfer the logs onto the baking sheet, evenly spaced apart. Gently flatten the tops of the logs. Beat the remaining egg and brush the tops of the logs liberally with the egg. Sprinkle the tops with the coarse or crystal sugar and bake for 25 minutes, until the dough feels firm to the touch.

Remove the cookie dough from the oven and cool 15 minutes. On a cutting board, use a serrated bread knife to diagonally cut the cookies into 1/2-inches slices. Lay the cookies cut side down on baking sheets and return to the oven for 20 to 30 minutes, turning the baking sheet midway during baking, until the cookies feel mostly firm.

Once baked, cool the cookies completely then store in an airtight container for up to two weeks. If you wish, the cookies can be half-dipped in melted chocolate, then cooled until the chocolate hardens.

Friday, December 19, 2014

Salted Caramel Apple Pie


A few years ago I took a Sur la Table class called "Take and Bake Pies" for Thanksgiving.  I absolutely loved the recipe for this salted caramel apple pie and you will too!  This is a great recipe to make with kids.  Sometimes as parents we don't realize what our kids are actually capable of doing unless we let them try.  Children also have more desire to try new things if they had a part in making it.

My son had a blast making the leaves, 


peeling the apples, 


mixing the caramel and pouring the mixture into the pie.


And then with the left over dough and apple peels and cores he decided to make a "penguin snowman and his fish".


Salted Caramel Apple Pie Recipe

Ingredients
My Pie Crust Recipe

Salted Caramel Sauce:
1 cup sugar
3/4 cup heavy cream
1/4 cup water
1 tbsp corn syrup
3 1/2 tbsp unsalted butter
1 teaspoon sea salt

Crumble Topping:
1 Cup all-purpose flour
3/4 cup brown sugar
3/4 cup chopped walnuts
1/2 tsp ground cinnamon
6 tbsp unsalted butter, melted

Apple Pie:
1 pie crust (above)
2 granny smith apples, peeled, cored, sliced
2 gala apples, peeled, cored, sliced
1/2 lemon, juiced
2 tbsp sugar
2 tbsp all purpose flour
Salted caramel sauce (above)
Crumble topping (above)

Directions:
For the caramel sauce: in a saucepan, combine the sugar, corn syrup and water over medium low heat until the sugar dissolves.  Increase the heat and bring to a boil, without stirring. Use the pastry brush to wash down an sugar crystals on the side of the ban to avoid the caramel from crystalizing.  Boil the liquid until the syrup is a deep amber color, about 4 minutes.  Remove the pan from the heat and carefully whisk in the cream.   The mixture will bubble up furiously.  (Don't panic.) Gently stir in the butter and salt.  To finish, pour the caramel in to a container and allow to cool.

For the crumble topping: combine the dry ingredients and stir to mix well.  Stir in the melted butter and mix to form crumbles.  Set aside.

For the apple pie: preheat oven to 350 degrees.  In a small bowl combine the sugar and flour and toss with apples.  Pour half of the prepared caramel sauce over the apples and stir well.

Arrange the leaf border after laying down one 9-inch pie crust.  Add the apples to the pie crust and cover with topping.  Use your hands to press down the topping all over the apples evenly, forming a compact crust.  Insert a pairing knife in the center through the topping to allow steam to escape.  (Do not slice the pastry!)

Place the prepared pie onto the hot baking sheet and bake until the pie is brown and the juices are bubbles, about 1-1 1/2 hours.  (If the pie browns too soon, cover it with foil.)  Cool to room temperature, slice, and drizzle with remaining caramel sauce.


Tuesday, December 9, 2014

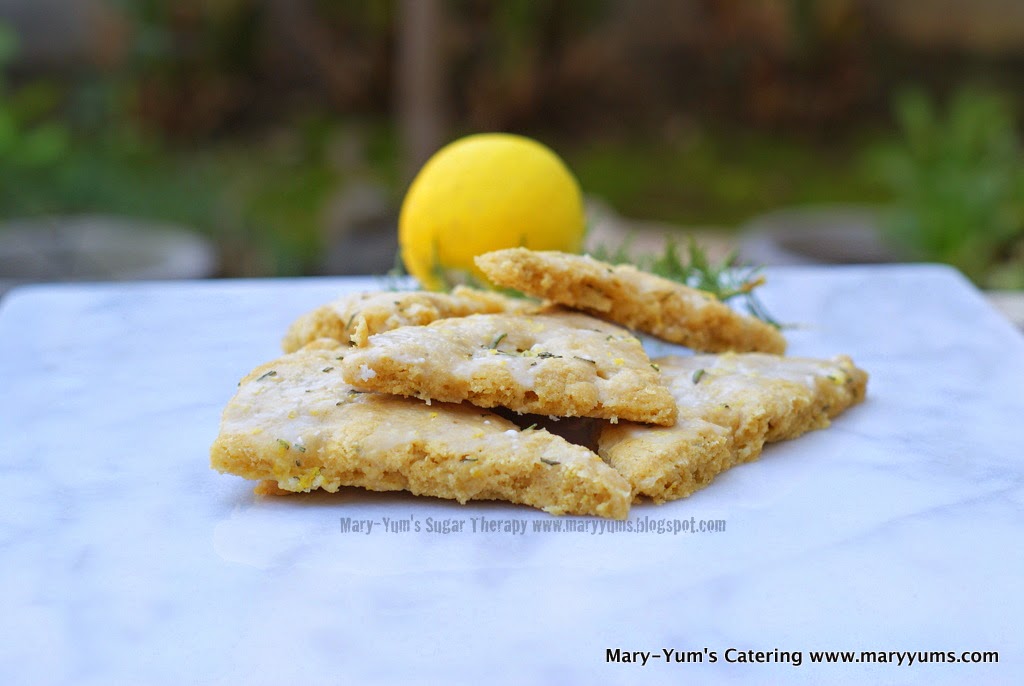
Lemon Rosemary Scones


I like baking with whole wheat as much as possible to try and sneak in as many nutrients as I can for myself and for my kids.  Pastry flour lightens the scone a bit but you still need the all purpose flour for the body of the scone.

I was truly inspired by my yard to find a recipe for the abundance of lemons


and rosemary.


Lemon Rosemary Scones Recipe
Barely adapted from Ree Drummond

Ingredients

SCONES
1 1/2cup All-purpose Flour
1 1/2 cups Whole Wheat Pastry Flour
2/3 cups Sugar
5 teaspoons Baking Powder
1/4 teaspoon Salt
2 sticks (1/2 Pound) Unsalted Butter, Chilled And Cut Into Pieces
1 whole Large Egg
1 cup Heavy Cream
1 Tablespoon Finely Minced Fresh Rosemary
Zest Of 1 Lemon

GLAZE
5 cups Powdered Sugar, Sifted
1/2 cup Whole Milk, More If Needed For Thinning
Zest And Juice From 1 Lemon
1 teaspoon Finely Minced Fresh Rosemary
Dash Of Salt
Preparation Instructions


Preheat oven to 350 degrees.

Sift together flours, sugar, baking powder, and salt.

Mix cream with egg, lemon zest and rosemary and allow to sit for 10 to 15 minutes to steep.


Use a pastry cutter or two knives to cut the butter pieces into the flour. Keep going until mixture resembles crumbs. Mix wet mixture with flour mixture; stir gently with a fork until combined. Mix should be crumbly, but if it's too crumbly to work with, splash in a small amount of heavy cream.


Turn dough onto a floured surface and lightly press it together until it forms a rough rectangle. Use a rolling pin to roll into a rectangle about 1/2 inch to 3/4 inch thick. Use your hands to help with the forming if necessary. Final rectangle should be about 18 inches by about 10 inches.

(This is where my hands got too messy to snap pictures.)


Use a knife to trim into a symmetrical rectangle, then cut the rectangle into 12 symmetrical squares/rectangles. Next, cut each square/rectangle in half diagonally, to form smaller triangles.

Transfer to a parchment or baking mat-lined cookie sheet and bake for 18 minutes, removing from the oven just before they start to turn golden. Allow to cool for 15 minutes on the cookie sheet, then transfer to a cooling rack to cool completely.

GLAZE

To make the icing, add lemon zest, lemon juice and rosemary into milk; allow to sit for awhile. Mix powdered sugar with the milk, adding more powdered sugar or milk if necessary to get the consistency the right thickness. Stir or whisk until completely smooth.

One at a time, carefully dunk each cooled scone in the glaze, turning it over if necessary. Transfer to parchment paper or the cooling rack. Allow the glaze to set completely, about an hour. Scones will keep several days if glazed.

Wednesday, December 3, 2014

Maple Apple Upside-down Cake


It was time for the annual "Friendsgiving" Potluck and this was my contribution!  So good, so moist, so seasonal.   At this time Pink Lady apples are in season and they are delicious.  I know most people say to only use Granny Smith however I like to use a blend.  Different apples give you different flavors and I like using what is ripe.  It's true that Granny Smith are the best to hold up to baking at high temperatures but they are also very tart.  Providing a mixture of apples gives your product a better taste and something special by being seasonal and local to your region.


Maple Apple Upside-down Cake Recipe
Barely adapted from Food and Wine

1 cup pure maple syrup
2 Pink Lady apples, peeled, cored, cut
1 Granny Smith apple—peeled, cored and cut into eighths
2 cups all-purpose flour
1 teaspoon baking powder
1/2 teaspoon baking soda
1 teaspoon salt
3 large eggs
3/4 cup buttermilk
1 tablespoon pure vanilla extract
1 1/2 sticks unsalted butter, softened
1 1/3 cups sugar
Vanilla ice cream, for serving

Preheat the oven to 350°. Butter and flour a 10-inch round cake pan. In a large saucepan, bring the maple syrup to a boil over high heat, then simmer over low heat until very thick and reduced to 3/4 cup, about 20 minutes. Pour the thickened syrup into the cake pan. Arrange the apples in the pan in 2 concentric circles, overlapping them slightly.
In a bowl, whisk the flour, baking powder, baking soda and salt. In a glass measuring cup, whisk the eggs with the buttermilk and vanilla. In the bowl of a standing electric mixer fitted with the paddle, beat the butter and sugar at medium speed until fluffy, about 3 minutes. Beat in the dry and wet ingredients in 3 alternating batches until the batter is smooth; scrape down the side of the bowl.
Scrape the batter over the apples and spread it in an even layer. Bake the cake for 1 1/2 hours, until golden on top and a toothpick inserted in the center comes out clean. Let the cake cool on a rack for 45 minutes.
Place a plate on top of the cake and invert the cake onto the plate; tap lightly to release the cake. Remove the pan. Let the cake cool slightly, then cut into wedges and serve with ice cream.

Friday, November 28, 2014

Pumpkin Tiramisu


I may have spoiled my son because when I was making this dessert for Thanksgiving he said to me, "Mama, you're using CANNED pumpkin?!"  It really depends on what you are trying to accomplish but in the case of pumpkin...it is one of the rare times I will say to use the pre-made puree.  My reasoning for this is simple.  You actually get a better product from the can.  The pumpkin puree is darker in color and intense in flavor.  Of course you could buy a sugar pie pumpkin and gut it, roast it, flesh it and puree it yourself.  But why would you want to go through all that trouble if it tastes the same or better pre-made?  Now we are talking about 100% pumpkin puree not pumpkin pie filling. These are two different products that will give you different results in your final dessert!  Try buying one that doesn't have any preservatives or added colors and artificial ingredients.

I have to say our Thanksgiving dinners are never traditional.  We always make things from scratch but we try different recipes and try following a theme.  This year we had an Asian theme.  The turkey was cooked with soy, honey, ginger and sesame.  Cranberry sauce was mixed with orange and ginger for a kick.  Orange chicken, stir fry beef, egg rolls for appetizers...I'm making myself hungry again.


So you're thinking what does tiramisu have to do with our Asian theme.  It doesn't.  It was simply a lighter end to a heavy meal.  Filled with pumpkin mousse and cut with the bitterness of coffee soaked ladyfingers.  It was perfect.


Pumpkin Tiramisu Recipe
Barely adapted from Food and Wine

One 15-ounce can pumpkin puree
1/2 cup light brown sugar
3/4 teaspoon ground ginger
3/4 teaspoon ground cinnamon
1/4 teaspoon kosher salt
Pinch of freshly grated nutmeg
3/4 cup granulated sugar
1 1/2 cups mascarpone cheese
2 1/2 cups heavy cream
2 cups brewed coffee, cooled
Two 7-ounce packages dry ladyfingers
Mini chocolate chips, for garnish

In a large bowl, whisk the pumpkin puree with the brown sugar, ginger, cinnamon, salt, nutmeg and 1/2 cup of the granulated sugar. Add the mascarpone and 1 1/2 cups of the heavy cream. Using an electric mixer, beat the pumpkin mixture at medium speed until soft peaks form; do not overbeat.
In a medium bowl, whisk the brewed coffee with 2 tablespoons of the granulated sugar until it’s dissolved. Dip both sides of 6 ladyfingers in the coffee and arrange them in a single layer in a 4-quart trifle dish. Spread 1 cup of the pumpkin mousse on top. Repeat the layering 5 more times, ending with a layer of the pumpkin mousse. Cover and refrigerate the tiramisu overnight.
In a large bowl, using an electric mixer, beat the remaining 1 cup of cream with the remaining 2 tablespoons of granulated sugar until soft peaks form. Dollop the whipped cream over the tiramisu, garnish with chocolate chips and serve.


Wednesday, November 19, 2014

Lego Surprise Cake

It was my son's birthday and he really wanted this surprise cake for his 7th birthday.  However, I surprised him by making the theme lego.


For more information about specialty cakes please email maryyums@gmail.com or visit www.maryyums.com


Wednesday, November 5, 2014

Nutella mug cake


There are just some great pleasures in life.  Amongst the top contenders is a cake for one... that can be made in under two minutes.  Don't like baking? No problem.  Just zap it in the microwave.  Life doesn't get any simpler than this.  Microwave on people.

I didn't have self-rising flour so I made my own!  It is just baking powder, salt and flour.  If you do end up making your own you may need to increase your liquid amount to compensate for the all purpose flour.  Self-rising flour usually has pastry flour containing less proteins which allows for a lighter cake.  The almond milk and egg whites was just to make me feel better about eating that much chocolate.  I used raspberries to cut through the richness of the chocolate and to balance out the flavors.

Nutella Chocolate Mug Cake Recipe

Ingredients
4 tablespoons self rising flour (see recipe below)
4 tablespoons white granulated sugar
2 tablespoons egg whites
3 tablespoons cocoa powder
3 tablespoons almond milk
3 tablespoons vegetable oil

Filling:
3 tablespoons Nutella or other chocolate hazelnut spread

Chocolate Swiss meringue buttercream:  
Find the recipe here.

Directions
1. Combine all ingredients in a large coffee mug. Whisk well with a fork until smooth. Microwave on high for 1 1/2 – 3 minutes. (Time depends on microwave wattage. Mine took 1 1/2 minutes.) 

2. Core out the cake and remove center.  Fill with nutella.

2. Top with buttercream. Enjoy!

Note: Depending on the wattage of your microwave, you may have to increase cooking time.


Self Rising flour recipe:
Whisk the following together thoroughly:
1 cup flour
1 ½ teaspoons baking powder
¼ teaspoon salt

Monday, October 27, 2014

Pumpkin cupcakes

Pumpkin Spice Cupcakes with Cream Cheese Frosting

Today I went to a great gelato place in downtown Los Angeles and they had a pumpkin spiced affogato.  YUM.  I realized after making these cupcakes that I should have added a couple of teaspoons of espresso to make this a pumpkin spice latte cupcake.  Oops.  Well that is my next inspiration.

This time of year makes me so  happy.  It's not just the pumpkins.  It's the pomegranates and butternut squash and soups that excite me.  I have a pomegranate tree with fruits just almost turning a beautiful red.  So excited to pick those!  Anyhow back to the pumpkin...  It doesn't feel like autumn here in sunny SoCal so I thought I would make it fall with these beautiful leaf cupcake liners and sprinkles.


Pumpkin Spice Cupcakes Recipe
Adapted from Georgetown Cupcake

Ingredients
2‑1/2 cups all-purpose flour
3 teaspoons baking powder
4 teaspoons pumpkin pie spice
1/2 teaspoon salt
16 tablespoons unsalted butter, at room temperature
2 cups sugar
4 eggs
1‑1/2 cups pumpkin puree
2 tablespoons mango honey
1/3 cup hot water
For the Cream Cheese Frosting:
8 tablespoons unsalted butter, at room temperature
8 cups confectioner's sugar, sifted
1/2 teaspoon pure vanilla extract
12 ounces cream cheese, at room temperature

Directions
Preheat the oven to 350 degrees Fahrenheit. Line two standard cupcake pans with twelve paper baking cups each, or grease pans with butter if not using baking cups.

Sift together the flour, baking powder, pumpkin pie spice, and salt on a sheet of parchment paper or wax paper and set aside.

Place the butter in the bowl of a stand mixer or in a bowl with a handheld electric mixer. Beat on medium speed until fluffy. Stop to add the sugar; then beat on medium speed until well incorporated.
Add the eggs one at a time, mixing slowly after each addition. Mix in the pumpkin puree and honey. Reduce the speed to low. Add one third of the flour mixture to the butter mixture, then gradually add one third of the hot water, beating until well incorporated. Add another third of the flour mixture, followed by one third of the hot water. Stop to scrape down the bowl as needed. Add the remaining flour mixture, followed by the remaining hot water, and mix slowly until just combined. Take care not to overmix the batter so the cupcakes will bake up light and fluffy.

Use a standard-size ice cream scoop to fill each baking cup with batter, so the wells are two-thirds full. Bake for 20 to 25 minutes or until a toothpick inserted into the center of a cupcake comes out clean. Transfer the pan to a wire rack to cool completely.

For the Frosting:
Place all the ingredients in the bowl of an electric mixer fitted with the paddle attachment; beat until well combined. Be sure to beat on high speed for at least two minutes at the end to ensure that the frosting is light and fluffy.


Monday, October 20, 2014

Hashbrown Quiche


Pepperjack cheese quiche with hash-brown crust


Weekend brunch item to knock your socks off!  Pepperjack cheese is one of my favorites.  Actually I think all cheeses are my favorite.  

I've been wanting to make this dish for a long time and the hash-browns were just waiting to be opened.  When I decided to make it this morning I realized I didn't have enough sour cream so I used some cream cheese instead.  I only had extra large eggs so I reduced it to be roughly the same amount as a large egg.  I didn't have scallions so I opened up one of my salad packs and sprinkled on some chopped spinach.  

Changing a recipe to what you have on hand is really easy.  Trust yourself that it will still taste good and making mistakes is the only way we can understand how ingredients work in a recipe.


Pepperjack cheese quiche with hash-brown crust recipe
Adapted from Martha Stewart

Ingredients
2 tablespoons butter, softened, plus more for pan
1 package (1 pound) frozen hash brown potatoes, thawed
8 extra large eggs
Coarse salt and ground pepper
1 cup reduced-fat sour cream
1/2 cup cream cheese
4 to 5 ounces shredded pepperjack cheese, room temperature
1/4 cup baby spinach leaves, chopped


Directions
Preheat oven to 375 degrees. Brush a 9-by-2 1/2-inch springform pan with butter. Line the sides of the pan with strips of waxed paper (the same height as pan); brush paper with butter.


Squeeze excess moisture from hash browns. Mix in a bowl with butter, 1 egg, 1 teaspoon coarse salt, and 1/4 teaspoon pepper.   
Tip: beat egg separately then add to the hash-brown mixture to make sure the egg mixes properly.


Pat into bottom and up sides of prepared pan, using a moistened dry measuring cup. 


Place on a rimmed baking sheet; bake until set, 15 to 20 minutes.


In a large bowl, whisk sour cream, cream cheese,  pepperjack cheese, 1 1/2 teaspoons coarse salt, and 1/4 teaspoon pepper until well combined; whisk in 7 remaining eggs.   
Tip: beating the eggs in a separate container and then adding them to your mixture ensures the whites and yolks will be distributed evenly.


Pour into crust, and sprinkle with spinach. Bake until set, 45 to 50 minutes. 


Unmold quiche, and peel off waxed paper before serving.  


Voila!  Perfect quiche!  So yummy!


picasa thingy