Pages

Friday, December 19, 2014

Salted Caramel Apple Pie


A few years ago I took a Sur la Table class called "Take and Bake Pies" for Thanksgiving.  I absolutely loved the recipe for this salted caramel apple pie and you will too!  This is a great recipe to make with kids.  Sometimes as parents we don't realize what our kids are actually capable of doing unless we let them try.  Children also have more desire to try new things if they had a part in making it.

My son had a blast making the leaves, 


peeling the apples, 


mixing the caramel and pouring the mixture into the pie.


And then with the left over dough and apple peels and cores he decided to make a "penguin snowman and his fish".


Salted Caramel Apple Pie Recipe

Ingredients
My Pie Crust Recipe

Salted Caramel Sauce:
1 cup sugar
3/4 cup heavy cream
1/4 cup water
1 tbsp corn syrup
3 1/2 tbsp unsalted butter
1 teaspoon sea salt

Crumble Topping:
1 Cup all-purpose flour
3/4 cup brown sugar
3/4 cup chopped walnuts
1/2 tsp ground cinnamon
6 tbsp unsalted butter, melted

Apple Pie:
1 pie crust (above)
2 granny smith apples, peeled, cored, sliced
2 gala apples, peeled, cored, sliced
1/2 lemon, juiced
2 tbsp sugar
2 tbsp all purpose flour
Salted caramel sauce (above)
Crumble topping (above)

Directions:
For the caramel sauce: in a saucepan, combine the sugar, corn syrup and water over medium low heat until the sugar dissolves.  Increase the heat and bring to a boil, without stirring. Use the pastry brush to wash down an sugar crystals on the side of the ban to avoid the caramel from crystalizing.  Boil the liquid until the syrup is a deep amber color, about 4 minutes.  Remove the pan from the heat and carefully whisk in the cream.   The mixture will bubble up furiously.  (Don't panic.) Gently stir in the butter and salt.  To finish, pour the caramel in to a container and allow to cool.

For the crumble topping: combine the dry ingredients and stir to mix well.  Stir in the melted butter and mix to form crumbles.  Set aside.

For the apple pie: preheat oven to 350 degrees.  In a small bowl combine the sugar and flour and toss with apples.  Pour half of the prepared caramel sauce over the apples and stir well.

Arrange the leaf border after laying down one 9-inch pie crust.  Add the apples to the pie crust and cover with topping.  Use your hands to press down the topping all over the apples evenly, forming a compact crust.  Insert a pairing knife in the center through the topping to allow steam to escape.  (Do not slice the pastry!)

Place the prepared pie onto the hot baking sheet and bake until the pie is brown and the juices are bubbles, about 1-1 1/2 hours.  (If the pie browns too soon, cover it with foil.)  Cool to room temperature, slice, and drizzle with remaining caramel sauce.


Tuesday, December 9, 2014

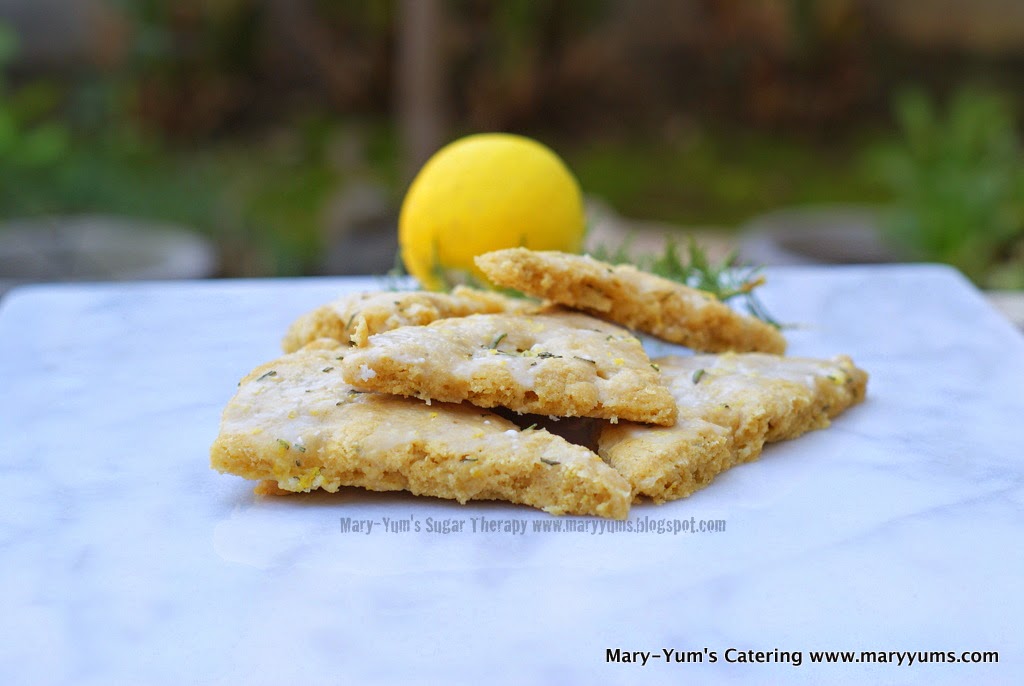
Lemon Rosemary Scones


I like baking with whole wheat as much as possible to try and sneak in as many nutrients as I can for myself and for my kids.  Pastry flour lightens the scone a bit but you still need the all purpose flour for the body of the scone.

I was truly inspired by my yard to find a recipe for the abundance of lemons


and rosemary.


Lemon Rosemary Scones Recipe
Barely adapted from Ree Drummond

Ingredients

SCONES
1 1/2cup All-purpose Flour
1 1/2 cups Whole Wheat Pastry Flour
2/3 cups Sugar
5 teaspoons Baking Powder
1/4 teaspoon Salt
2 sticks (1/2 Pound) Unsalted Butter, Chilled And Cut Into Pieces
1 whole Large Egg
1 cup Heavy Cream
1 Tablespoon Finely Minced Fresh Rosemary
Zest Of 1 Lemon

GLAZE
5 cups Powdered Sugar, Sifted
1/2 cup Whole Milk, More If Needed For Thinning
Zest And Juice From 1 Lemon
1 teaspoon Finely Minced Fresh Rosemary
Dash Of Salt
Preparation Instructions


Preheat oven to 350 degrees.

Sift together flours, sugar, baking powder, and salt.

Mix cream with egg, lemon zest and rosemary and allow to sit for 10 to 15 minutes to steep.


Use a pastry cutter or two knives to cut the butter pieces into the flour. Keep going until mixture resembles crumbs. Mix wet mixture with flour mixture; stir gently with a fork until combined. Mix should be crumbly, but if it's too crumbly to work with, splash in a small amount of heavy cream.


Turn dough onto a floured surface and lightly press it together until it forms a rough rectangle. Use a rolling pin to roll into a rectangle about 1/2 inch to 3/4 inch thick. Use your hands to help with the forming if necessary. Final rectangle should be about 18 inches by about 10 inches.

(This is where my hands got too messy to snap pictures.)


Use a knife to trim into a symmetrical rectangle, then cut the rectangle into 12 symmetrical squares/rectangles. Next, cut each square/rectangle in half diagonally, to form smaller triangles.

Transfer to a parchment or baking mat-lined cookie sheet and bake for 18 minutes, removing from the oven just before they start to turn golden. Allow to cool for 15 minutes on the cookie sheet, then transfer to a cooling rack to cool completely.

GLAZE

To make the icing, add lemon zest, lemon juice and rosemary into milk; allow to sit for awhile. Mix powdered sugar with the milk, adding more powdered sugar or milk if necessary to get the consistency the right thickness. Stir or whisk until completely smooth.

One at a time, carefully dunk each cooled scone in the glaze, turning it over if necessary. Transfer to parchment paper or the cooling rack. Allow the glaze to set completely, about an hour. Scones will keep several days if glazed.

Wednesday, December 3, 2014

Maple Apple Upside-down Cake


It was time for the annual "Friendsgiving" Potluck and this was my contribution!  So good, so moist, so seasonal.   At this time Pink Lady apples are in season and they are delicious.  I know most people say to only use Granny Smith however I like to use a blend.  Different apples give you different flavors and I like using what is ripe.  It's true that Granny Smith are the best to hold up to baking at high temperatures but they are also very tart.  Providing a mixture of apples gives your product a better taste and something special by being seasonal and local to your region.


Maple Apple Upside-down Cake Recipe
Barely adapted from Food and Wine

1 cup pure maple syrup
2 Pink Lady apples, peeled, cored, cut
1 Granny Smith apple—peeled, cored and cut into eighths
2 cups all-purpose flour
1 teaspoon baking powder
1/2 teaspoon baking soda
1 teaspoon salt
3 large eggs
3/4 cup buttermilk
1 tablespoon pure vanilla extract
1 1/2 sticks unsalted butter, softened
1 1/3 cups sugar
Vanilla ice cream, for serving

Preheat the oven to 350°. Butter and flour a 10-inch round cake pan. In a large saucepan, bring the maple syrup to a boil over high heat, then simmer over low heat until very thick and reduced to 3/4 cup, about 20 minutes. Pour the thickened syrup into the cake pan. Arrange the apples in the pan in 2 concentric circles, overlapping them slightly.
In a bowl, whisk the flour, baking powder, baking soda and salt. In a glass measuring cup, whisk the eggs with the buttermilk and vanilla. In the bowl of a standing electric mixer fitted with the paddle, beat the butter and sugar at medium speed until fluffy, about 3 minutes. Beat in the dry and wet ingredients in 3 alternating batches until the batter is smooth; scrape down the side of the bowl.
Scrape the batter over the apples and spread it in an even layer. Bake the cake for 1 1/2 hours, until golden on top and a toothpick inserted in the center comes out clean. Let the cake cool on a rack for 45 minutes.
Place a plate on top of the cake and invert the cake onto the plate; tap lightly to release the cake. Remove the pan. Let the cake cool slightly, then cut into wedges and serve with ice cream.

Friday, November 28, 2014

Pumpkin Tiramisu


I may have spoiled my son because when I was making this dessert for Thanksgiving he said to me, "Mama, you're using CANNED pumpkin?!"  It really depends on what you are trying to accomplish but in the case of pumpkin...it is one of the rare times I will say to use the pre-made puree.  My reasoning for this is simple.  You actually get a better product from the can.  The pumpkin puree is darker in color and intense in flavor.  Of course you could buy a sugar pie pumpkin and gut it, roast it, flesh it and puree it yourself.  But why would you want to go through all that trouble if it tastes the same or better pre-made?  Now we are talking about 100% pumpkin puree not pumpkin pie filling. These are two different products that will give you different results in your final dessert!  Try buying one that doesn't have any preservatives or added colors and artificial ingredients.

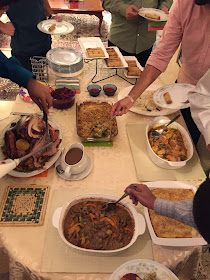
I have to say our Thanksgiving dinners are never traditional.  We always make things from scratch but we try different recipes and try following a theme.  This year we had an Asian theme.  The turkey was cooked with soy, honey, ginger and sesame.  Cranberry sauce was mixed with orange and ginger for a kick.  Orange chicken, stir fry beef, egg rolls for appetizers...I'm making myself hungry again.


So you're thinking what does tiramisu have to do with our Asian theme.  It doesn't.  It was simply a lighter end to a heavy meal.  Filled with pumpkin mousse and cut with the bitterness of coffee soaked ladyfingers.  It was perfect.


Pumpkin Tiramisu Recipe
Barely adapted from Food and Wine

One 15-ounce can pumpkin puree
1/2 cup light brown sugar
3/4 teaspoon ground ginger
3/4 teaspoon ground cinnamon
1/4 teaspoon kosher salt
Pinch of freshly grated nutmeg
3/4 cup granulated sugar
1 1/2 cups mascarpone cheese
2 1/2 cups heavy cream
2 cups brewed coffee, cooled
Two 7-ounce packages dry ladyfingers
Mini chocolate chips, for garnish

In a large bowl, whisk the pumpkin puree with the brown sugar, ginger, cinnamon, salt, nutmeg and 1/2 cup of the granulated sugar. Add the mascarpone and 1 1/2 cups of the heavy cream. Using an electric mixer, beat the pumpkin mixture at medium speed until soft peaks form; do not overbeat.
In a medium bowl, whisk the brewed coffee with 2 tablespoons of the granulated sugar until it’s dissolved. Dip both sides of 6 ladyfingers in the coffee and arrange them in a single layer in a 4-quart trifle dish. Spread 1 cup of the pumpkin mousse on top. Repeat the layering 5 more times, ending with a layer of the pumpkin mousse. Cover and refrigerate the tiramisu overnight.
In a large bowl, using an electric mixer, beat the remaining 1 cup of cream with the remaining 2 tablespoons of granulated sugar until soft peaks form. Dollop the whipped cream over the tiramisu, garnish with chocolate chips and serve.


Wednesday, November 19, 2014

Lego Surprise Cake

It was my son's birthday and he really wanted this surprise cake for his 7th birthday.  However, I surprised him by making the theme lego.


For more information about specialty cakes please email maryyums@gmail.com or visit www.maryyums.com


Wednesday, November 5, 2014

Nutella mug cake


There are just some great pleasures in life.  Amongst the top contenders is a cake for one... that can be made in under two minutes.  Don't like baking? No problem.  Just zap it in the microwave.  Life doesn't get any simpler than this.  Microwave on people.

I didn't have self-rising flour so I made my own!  It is just baking powder, salt and flour.  If you do end up making your own you may need to increase your liquid amount to compensate for the all purpose flour.  Self-rising flour usually has pastry flour containing less proteins which allows for a lighter cake.  The almond milk and egg whites was just to make me feel better about eating that much chocolate.  I used raspberries to cut through the richness of the chocolate and to balance out the flavors.

Nutella Chocolate Mug Cake Recipe

Ingredients
4 tablespoons self rising flour (see recipe below)
4 tablespoons white granulated sugar
2 tablespoons egg whites
3 tablespoons cocoa powder
3 tablespoons almond milk
3 tablespoons vegetable oil

Filling:
3 tablespoons Nutella or other chocolate hazelnut spread

Chocolate Swiss meringue buttercream:  
Find the recipe here.

Directions
1. Combine all ingredients in a large coffee mug. Whisk well with a fork until smooth. Microwave on high for 1 1/2 – 3 minutes. (Time depends on microwave wattage. Mine took 1 1/2 minutes.) 

2. Core out the cake and remove center.  Fill with nutella.

2. Top with buttercream. Enjoy!

Note: Depending on the wattage of your microwave, you may have to increase cooking time.


Self Rising flour recipe:
Whisk the following together thoroughly:
1 cup flour
1 ½ teaspoons baking powder
¼ teaspoon salt

Monday, October 27, 2014

Pumpkin cupcakes

Pumpkin Spice Cupcakes with Cream Cheese Frosting

Today I went to a great gelato place in downtown Los Angeles and they had a pumpkin spiced affogato.  YUM.  I realized after making these cupcakes that I should have added a couple of teaspoons of espresso to make this a pumpkin spice latte cupcake.  Oops.  Well that is my next inspiration.

This time of year makes me so  happy.  It's not just the pumpkins.  It's the pomegranates and butternut squash and soups that excite me.  I have a pomegranate tree with fruits just almost turning a beautiful red.  So excited to pick those!  Anyhow back to the pumpkin...  It doesn't feel like autumn here in sunny SoCal so I thought I would make it fall with these beautiful leaf cupcake liners and sprinkles.


Pumpkin Spice Cupcakes Recipe
Adapted from Georgetown Cupcake

Ingredients
2‑1/2 cups all-purpose flour
3 teaspoons baking powder
4 teaspoons pumpkin pie spice
1/2 teaspoon salt
16 tablespoons unsalted butter, at room temperature
2 cups sugar
4 eggs
1‑1/2 cups pumpkin puree
2 tablespoons mango honey
1/3 cup hot water
For the Cream Cheese Frosting:
8 tablespoons unsalted butter, at room temperature
8 cups confectioner's sugar, sifted
1/2 teaspoon pure vanilla extract
12 ounces cream cheese, at room temperature

Directions
Preheat the oven to 350 degrees Fahrenheit. Line two standard cupcake pans with twelve paper baking cups each, or grease pans with butter if not using baking cups.

Sift together the flour, baking powder, pumpkin pie spice, and salt on a sheet of parchment paper or wax paper and set aside.

Place the butter in the bowl of a stand mixer or in a bowl with a handheld electric mixer. Beat on medium speed until fluffy. Stop to add the sugar; then beat on medium speed until well incorporated.
Add the eggs one at a time, mixing slowly after each addition. Mix in the pumpkin puree and honey. Reduce the speed to low. Add one third of the flour mixture to the butter mixture, then gradually add one third of the hot water, beating until well incorporated. Add another third of the flour mixture, followed by one third of the hot water. Stop to scrape down the bowl as needed. Add the remaining flour mixture, followed by the remaining hot water, and mix slowly until just combined. Take care not to overmix the batter so the cupcakes will bake up light and fluffy.

Use a standard-size ice cream scoop to fill each baking cup with batter, so the wells are two-thirds full. Bake for 20 to 25 minutes or until a toothpick inserted into the center of a cupcake comes out clean. Transfer the pan to a wire rack to cool completely.

For the Frosting:
Place all the ingredients in the bowl of an electric mixer fitted with the paddle attachment; beat until well combined. Be sure to beat on high speed for at least two minutes at the end to ensure that the frosting is light and fluffy.


Monday, October 20, 2014

Hashbrown Quiche


Pepperjack cheese quiche with hash-brown crust


Weekend brunch item to knock your socks off!  Pepperjack cheese is one of my favorites.  Actually I think all cheeses are my favorite.  

I've been wanting to make this dish for a long time and the hash-browns were just waiting to be opened.  When I decided to make it this morning I realized I didn't have enough sour cream so I used some cream cheese instead.  I only had extra large eggs so I reduced it to be roughly the same amount as a large egg.  I didn't have scallions so I opened up one of my salad packs and sprinkled on some chopped spinach.  

Changing a recipe to what you have on hand is really easy.  Trust yourself that it will still taste good and making mistakes is the only way we can understand how ingredients work in a recipe.


Pepperjack cheese quiche with hash-brown crust recipe
Adapted from Martha Stewart

Ingredients
2 tablespoons butter, softened, plus more for pan
1 package (1 pound) frozen hash brown potatoes, thawed
8 extra large eggs
Coarse salt and ground pepper
1 cup reduced-fat sour cream
1/2 cup cream cheese
4 to 5 ounces shredded pepperjack cheese, room temperature
1/4 cup baby spinach leaves, chopped


Directions
Preheat oven to 375 degrees. Brush a 9-by-2 1/2-inch springform pan with butter. Line the sides of the pan with strips of waxed paper (the same height as pan); brush paper with butter.


Squeeze excess moisture from hash browns. Mix in a bowl with butter, 1 egg, 1 teaspoon coarse salt, and 1/4 teaspoon pepper.   
Tip: beat egg separately then add to the hash-brown mixture to make sure the egg mixes properly.


Pat into bottom and up sides of prepared pan, using a moistened dry measuring cup. 


Place on a rimmed baking sheet; bake until set, 15 to 20 minutes.


In a large bowl, whisk sour cream, cream cheese,  pepperjack cheese, 1 1/2 teaspoons coarse salt, and 1/4 teaspoon pepper until well combined; whisk in 7 remaining eggs.   
Tip: beating the eggs in a separate container and then adding them to your mixture ensures the whites and yolks will be distributed evenly.


Pour into crust, and sprinkle with spinach. Bake until set, 45 to 50 minutes. 


Unmold quiche, and peel off waxed paper before serving.  


Voila!  Perfect quiche!  So yummy!


Monday, October 13, 2014

Classic cheesecake

Classic cheesecake with Strawberry Creme Anglaise

It's one of those recipes that you pop out for your loved one or somebody special.  But I say you should just make it for yourself because you deserve it.  Working hard, juggling jobs, parenting, relationships and the list goes on.  

I had a chance to watch Disney's Brave with my almost seven year old son.  I was thrilled to see that the princess finally did not need true love to find happiness.  There's something that she said at the end of the movie that resonated with me.  Princess Merida: "There are those who say fate is something beyond our command. That destiny is not our own, but I know better. Our fate lives within us, you only have to be brave enough to see it."  So what is fate and why do people believe in it.  Is it really as simple as Merida tells us?  Does fate live within us?  And how does psychotherapy fit into it?


Theraputic topic for the week: fate and destiny.

Destiny is different than fate. Destiny, as psychiatrist Alexander Lowen (1980) notes, "is related to the word destination. It refers to what . . . [we become], whereas fate describes what one is." (p. 49) Destiny is what we do with fate, how we play the hand we're each dealt by fate. Destiny is determined not solely by fate, but by how we choose to respond to fate. We are responsible for those choices. Part of each person's fate includes a personal destiny. But whether that destiny is fulfilled or not depends in part on the person and whether he or she is willing to accept responsibility for and courageously pursue that destiny. Finding and fulfilling our destiny is a principal goal of existential depth psychology.
Excerpt from Psychology Today in an article called Essential Secrets of Psychotherapy : Fate, Destiny and Responsibility written by Stephen Diamond.


Classic Cheesecake Recipe

Ingredients:
For the crust:
1 3/4 cups graham cracker crumbs
1/4 cup firmly packed brown sugar
8 Tbs. (1 stick) unsalted butter, melted and cooled

For the filling:
2 lb. cream cheese, at room temperature
1 cup granulated sugar
1 cup heavy cream
1 tsp. vanilla extract
1 Tbs. water
1 tsp. unflavored gelatin

To serve: Strawberry Creme Anglaise
2 cups half-and-half or whole milk
1 vanilla bean, split lengthwise
1/2 cup sugar
4 large egg yolks, at room temperature
1 cup strawberries

Directions:
Preheat an oven to 350°F.

To make the crust, in a food processor fitted with the metal blade, combine the graham cracker crumbs, brown sugar and lemon zest, and process to mix well. Add the butter and process until the crumbs begin to stick together. Drape your hand with plastic wrap to form a glove, and press the crumbs evenly and firmly over the bottom and 2 inches up the side of a 9-by-2 1/2-inch springform pan. Bake the crust 10 minutes. Remove from the oven and cool to room temperature, about 30 minutes.

To make the filling, in a large bowl, combine the cream cheese and granulated sugar. Using an electric mixer, beat on medium speed until well blended. Beat in 1/2 cup of the cream and the vanilla until incorporated.

Place the water in a small saucepan. Sprinkle the gelatin over the water and let soften for 5 minutes. Place the saucepan over low heat and stir until the gelatin is dissolved, then gradually whisk in the remaining 1/2 cup cream. Add the gelatin mixture to the cream cheese mixture and beat until fluffy, about 1 minute. Spoon the filling into the cooled crust. Cover with aluminum foil and refrigerate overnight or up to 2 days. 

For the strawberry creme anglaise: Set a large fine strainer over a medium bowl and set the bowl in a shallow pan of cold water. In a large saucepan, combine the half-and-half and vanilla bean and cook over moderately low heat just until small bubbles appear around the rim, about 5 minutes.
In another medium bowl, whisk the sugar and egg yolks just until combined. Whisk in half of the hot half-and-half in a thin stream. Pour the mixture into the saucepan and cook over moderate heat, stirring constantly with a wooden spoon, until the sauce has thickened slightly, 4 to 5 minutes. Immediately strain the sauce into the bowl in the cold water bath to stop the cooking. Scrape the vanilla seeds into the sauce. Refrigerate until chilled.  Hull strawberries and add blender with the creme anglaise. Blend thoroughly. 

To serve, run a knife around the pan sides to loosen the cake. Release the pan sides and place the cake on a plate. Cut the cake into individual slices and spoon strawberry creme anglaise over each slice.


Monday, October 6, 2014

Catering for Charity


Red Velvet Cupcakes for Alderwood Elementary School's Cakewalk Fundraiser!  For more catering event details and information please visit www.maryyums.com.


Monday, September 29, 2014

Specialty ballerina cake


This specialty cake was made for a little girl who loved ballerinas and the color blue!  Happy 7th Birthday Eva!  For more information on catering deserts please visit www.maryyums.com.


Tuesday, September 23, 2014

Homemade Eclairs


So I learned how to make pastry cream in my baking class and didn't have the heart to throw it away. I searched for ideas on what to do with it and there are a number of treats.  Cream puffs and trifles but then I saw eclairs.  Who doesn't love eclairs?  Sometimes there is nothing more satisfying than light pastry filled with cream... and then dipped in chocolate. Pastry cream is one of the most basic techniques that every chef has a recipe for.  It can be whipped up in no time at all with ingredients you usually have on hand.

When I was younger Gale Gand's show used to come on Food Network called "Sweet Dreams".  My love for baking and appreciation for the final dessert product was encouraged by her.  It's too bad the show doesn't come on anymore because she has some really great techniques that any home cook can benefit from.  Nevertheless, her recipes can still be found on Food Network's website.


Therapeutic topic of the week: Be kind.

An act of kindness doesn’t have to be extravagant to be meaningful. The key is to bring mindful intention to these simple daily acts. You can hold a door for someone, let someone who appears rushed go ahead of you in line, write a kind note to a friend in need. These acts of kindness benefit you as much as they benefit the person you have helped.

Homemade Eclairs
Adapted from Gale Gand

Ingredients

Filling:
2 cups whole, 2 percent fat, or 1 percent fat milk
1 tsp vanilla
6 egg yolks
2/3 cup sugar
1/4 cup cornstarch
1 tablespoon cold unsalted butter

Pastry:
1 cup water
8 tablespoons (1 stick) unsalted butter
1/2 teaspoon salt
1 1/2 teaspoons sugar
1 cup all-purpose flour
3 eggs, plus 1 extra, if needed
Egg Wash:
1 egg
1 1/2 teaspoons water
Chocolate Glaze:
1/2 cup heavy cream
4 ounces semisweet chocolate, coarsely chopped
Directions
Filling: In a medium saucepan, heat the milk to a boil over medium heat. Immediately turn off the heat and set aside to infuse for 15 minutes. In a bowl, whisk the egg yolks and sugar until light and fluffy. Add the cornstarch and whisk vigorously until no lumps remain. Add vanilla. Whisk in 1/4 cup of the hot milk mixture until incorporated. Whisk in the remaining hot milk mixture, reserving the saucepan. Pour the mixture through a strainer back into the saucepan. Cook over medium-high heat, whisking constantly, until thickened and slowly boiling. Remove from the heat and stir in the butter. Let cool slightly. Cover with plastic wrap, lightly pressing the plastic against the surface to prevent a skin from forming. Chill at least 2 hours or until ready to serve. The custard can be made up to 24 hours in advance. Refrigerate until 1 hour before using.

Pastry: Preheat the oven to 425 degrees. Line a sheet pan with parchment paper. In a large saucepan, bring the water, butter, salt and sugar to a rolling boil over medium-high heat. When it boils, immediately take the pan off the heat. Stirring with a wooden spoon, add all the flour at once and stir hard until all the flour is incorporated, 30 to 60 seconds. Return to the heat and cook, stirring, 30 seconds. Scrape the mixture into a mixer fitted with a paddle attachment (or use a hand mixer). Mix at medium speed. With the mixer running, add 3 eggs, 1 egg at a time. Stop mixing after each addition to scrape down the sides of the bowl. Mix until the dough is smooth and glossy and the eggs are completely incorporated. The dough should be thick, but should fall slowly and steadily from the beaters when you lift them out of the bowl. If the dough is still clinging to the beaters, add the remaining 1 egg and mix until incorporated.

Using a pastry bag fitted with a large plain tip, pipe fat lengths of dough (about the size and shape of a jumbo hot dog) onto the lined baking sheet, leaving 2 inches of space between them. You should have 8 to 10 lengths.

Egg Wash: In a bowl, whisk the egg and water together. Brush the surface of each eclair with the egg wash. Use your fingers to smooth out any bumps of points of dough that remain on the surface. Bake 15 minutes, then reduce the heat to 375 degrees and bake until puffed up and light golden brown, about 25 minutes more. Try not to open the oven door too often during the baking. Let cool on the baking sheet. Fit a medium-size plain pastry tip over your index finger and use it to make a hole in the end of each eclair (or just use your fingertip). Using a pastry bag fitted with a medium-size plain tip, gently pipe the custard into the eclairs, using only just enough to fill the inside (don't stuff them full).

Glaze: In a small saucepan, heat the cream over medium heat just until it boils. Immediately turn off the heat. Put the chocolate in a medium bowl. Pour the hot cream over the chocolate and whisk until melted and smooth. Set aside and keep warm. The glaze can be made up to 48 hours in advance. Cover and refrigerate until ready to use, and rewarm in a microwave or over hot water when ready to use.

Dip the tops of the eclairs in the warm chocolate glaze and set on a sheet pan. Chill, uncovered, at least 1 hour to set the glaze. Serve chilled.

Wednesday, September 17, 2014

birthday cake truffles


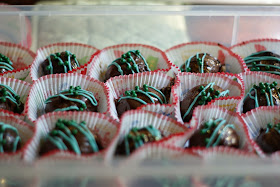
Red velvet cake truffles covered in chocolate and decorated in green and blue for a birthday meets baby shower event!  For more catering and specialty desserts please visit www.maryyums.com.


Monday, September 8, 2014

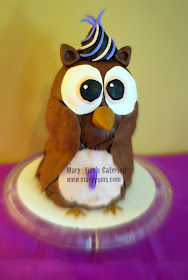
Whoo's turning one?


Owl themed birthday cake for a one year old girl.  Please visit www.maryyums.com for more information on catering desserts at your next event.


Tuesday, September 2, 2014

sweet sixteen cake


This specific rose pattern was requested for an elegant sweet sixteen birthday.
For more information please visit www.maryyums.com


Tuesday, August 26, 2014

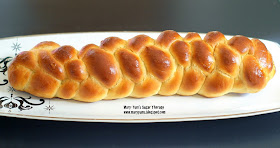
Challah bread


Challah bread is great for soaking up delicious custards.  You can use it for french toast or bread puddings.  You can try my Nutella Banana Bread Pudding recipe here. It is a rich, strong bread with a slight sweetness and can be eaten plain.  There are many different braiding techniques, this one uses a four braid.  You can find different braiding techniques here.

Challah Recipe
Makes two large loaves

1 1/2 cup warm water, divided
1/4 cup plus 2 teaspoons sugar, divided
2 tablespoons instant yeast
6 cups flour -- either all white or half white whole wheat
2 teaspoons salt
1/4 cup mild honey, plus an extra tablespoon for eggwash, if desired
2/3  cups flavorless vegetable or canola oil
4 eggs, plus one yolk for eggwash, if desired
1 pinch ground cardamom, optional

Put 1 cup warm water in a small bowl. Add 2 teaspoons of sugar, sprinkle the yeast over top, swirl the bowl just to combine, and leave it to proof for five minutes. 

While yeast is proofing, mix flour, salt, 1/4 cup of sugar and cardamom, if using, in a large bowl (or in the bowl of a stand mixer fitted with the paddle attachment.) Stir to incorporate or blend on low speed.
In a medium bowl, mix remaining water, honey, oil, and eggs. 

When yeast has finished proofing, add it to the flour, immediately followed by wet ingredients. Mix with a large wooden spoon or on medium-low speed in the mixer, just until combined, about 30 seconds. 

Switch to dough hook and begin to knead on low speed, making sure to incorporate what's at the bottom of the bowl if the dough hook misses it. If kneading by hand, stir using spoon until dough becomes to thick to stir. Empty dough onto well-floured surface and knead by hand. Knead dough until smooth and no longer sticky, adding flour with a light hand as needed, 7-10 minutes. 

Split the dough into two equal pieces. Set each in a large oiled bowl, cover both bowls with plastic wrap or a damp towel, and let rise at room temperature until doubled in size. If using white flour, this should take about 2-2.5 hours. If using white whole wheat, it will take closer to 3.5 or 4. Feel free to let the dough rise in the refrigerator overnight instead; if you do this, be sure to set out the dough in plenty of time before shaping, so it can come to room temperature. 

Preheat oven to 375.
After the rise, the dough should be soft and pliable. Separate each mound of dough into three equal balls, for a total of six. Roll each ball into a log almost 1-foot long. Braid the logs together to create your loaf. For the nicest-looking braid, do not pinch the top edges of your logs together before braiding; simply place one log over the next and braid until you reach the bottom, then pinch those edges together. Then, flip the unfinished loaf the long way, so that the unfinished edge is now at the bottom and the loaf has been flipped over and upside down. Finish braiding and pinch these edges together. This way, both ends look identical. Tuck the very tips beneath the loaf when braiding is finished. 
Repeat with second loaf. 

Put each loaf on its own silpat-lined baking sheet. If using egg wash, mix yolk with a 1 tablespoon water and 1 tablespoon honey. Brush over loaves. Bake at 375 degrees for 20-22 minutes, until challot are golden and baked through.

Tuesday, August 19, 2014

Wedding Dessert Buffet


Miniature "eton mess" meaning fruit and cream as well as miniature chocolate mousse.  Specialty items for a wedding dessert buffet table.  For more information please contact www.maryyums.com


Wednesday, August 13, 2014

baby umbrellas


A literal "baby shower" theme in purple and yellow.  Delicious cupcakes and specialty item cake push treats.  Visit www.maryyums.com for more information.